Scaling Your App on PipeOps
When your app suddenly gets a wave of traffic — a product launch, a viral moment, or just a busy day, the last thing you want is for it to slow down or crash. Scalability is what keeps your application fast, stable, and available no matter how many users show up.
PipeOps makes this easy by letting you scale horizontally (adding more replicas of your application) or vertically (increasing CPU and memory).
This guide walks you through configuring both on PipeOps.
Prerequisites
Before you begin, ensure you have:
- A server created on PipeOps
- A project deployed to that server
Step 1 - Adjust Resource Allocation (Vertical Scaling)
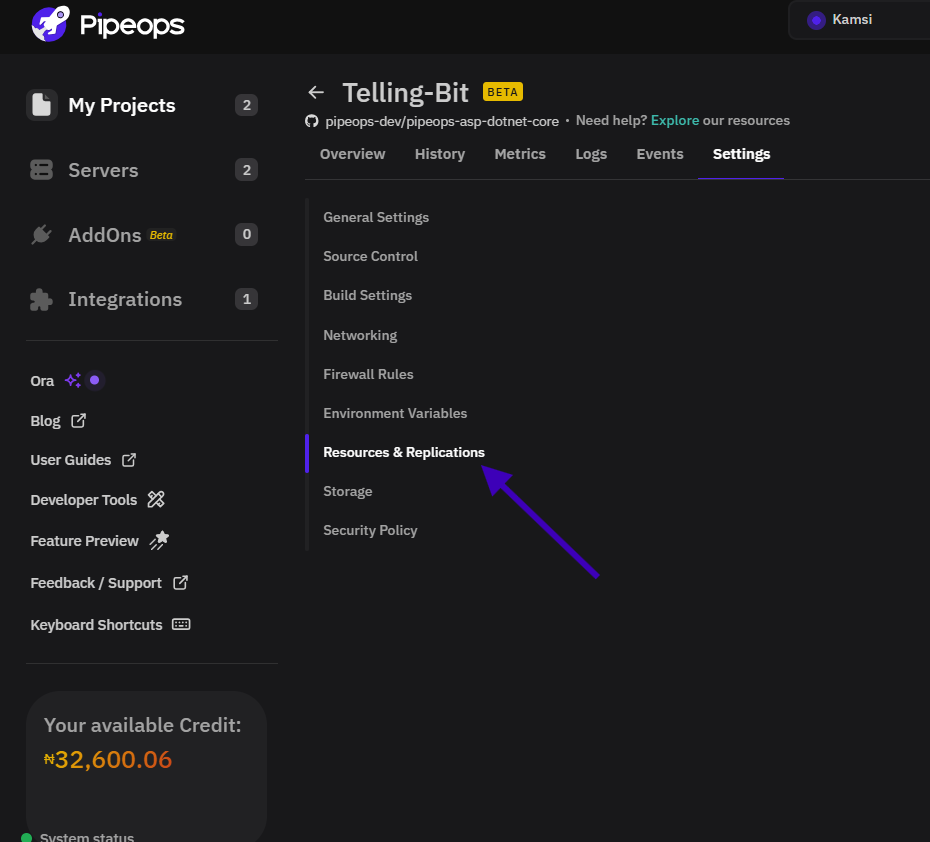
Navigate to your project and open the Settings tab.
Select Resources & Replication.
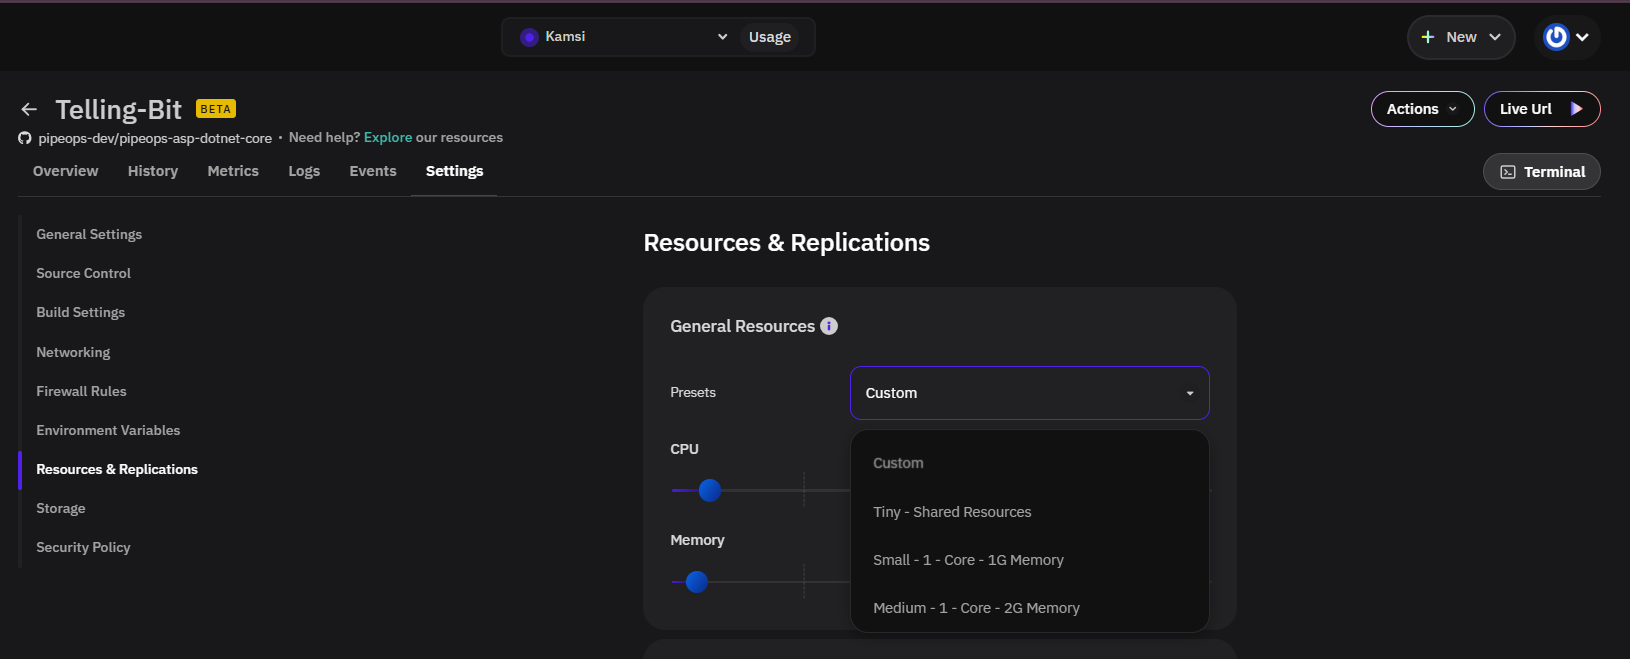
Under General Resources, choose a preset or configure manually:
| Preset | CPU | Memory |
|---|---|---|
| Tiny | Shared | Shared |
| Small | 1 core | 1GB |
| Medium | 1 core | 2GB |
Note: Available presets depend on your active subscription plan.
To go beyond the presets, drag the CPU and memory sliders to set custom values.
Step 2 - Configure Autoscaling (Horizontal Scaling)
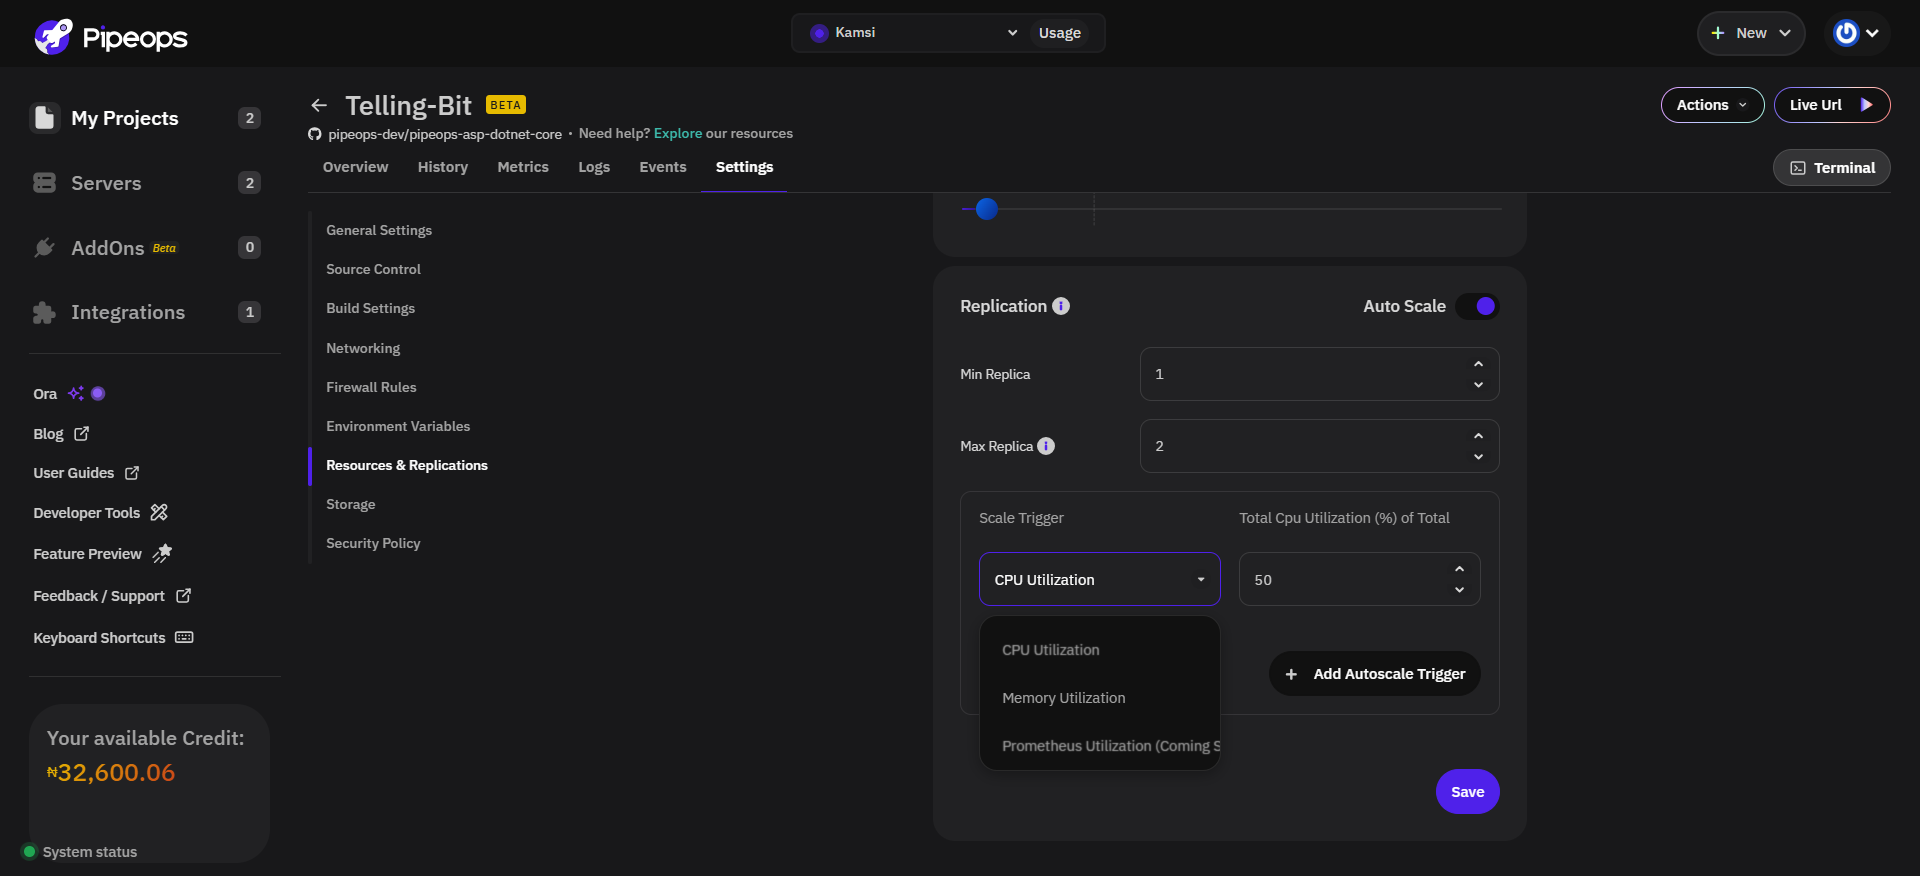
Scroll to the Replication section.
Toggle Autoscale on.
Set your replica bounds:
- Min replicas: the minimum number of instances always running
- Max replicas: the upper limit PipeOps can scale up to
Add one or more scale triggers:
- CPU utilization: scales up when CPU usage crosses configured threshold
- Memory utilization: scales up when memory consumption crosses configured threshold
You can combine both triggers. PipeOps will act on whichever threshold is hit first.
Step 3 - Save Your Configuration
Click Save.
PipeOps will now automatically scale your application up or down based on the triggers you defined, keeping it responsive under load.
And that's all it takes. Your app will now automatically scale up when traffic spikes and back down when things quiet down. No manual intervention needed.
Build, ship, and let PipeOps handle the rest.