How to Enable Firewall Rules on PipeOps
Firewall rules are essential for controlling network access to and from your deployed applications. By defining clear rules, you can limit access to trusted sources and ensure your applications operate within intended network boundaries. PipeOps provides flexible firewall controls that let you manage both inbound and outbound traffic directly within your project settings.
Why Firewall Rules Matter
Firewall rules let you enforce IP policies that define how your application communicates with the outside world. This feature gives you granular control over network access and helps secure your deployment.
You can use firewall rules to:
-
Allow only specific IP ranges, helping you meet legal or regulatory requirements.
-
Control which ports can communicate with your application.
-
Limit access to websites or data to trusted IP addresses.
-
Allow outbound access only to specific external services, such as APIs or databases.
Enabling Firewall Rules
Firewall rules are currently available as a beta feature on PipeOps. Before you can configure firewall rules, you need to enable this feature:
-
Go to your PipeOps dashboard.
-
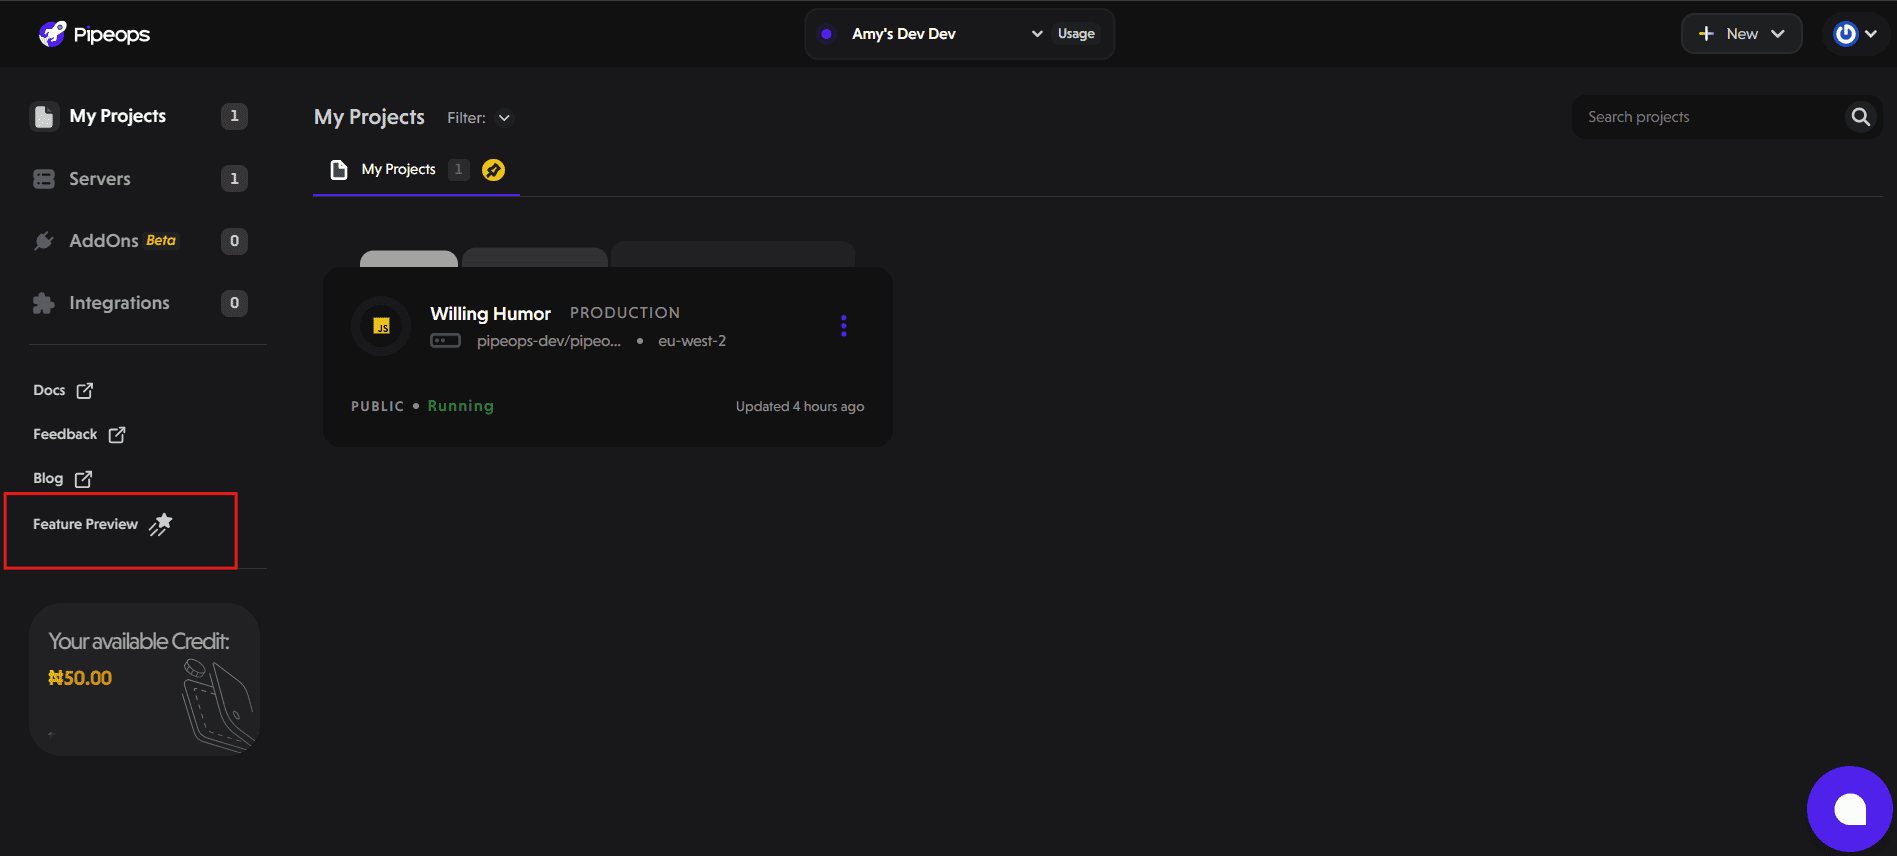
In the left sidebar, click Feature Preview.
- Toggle the switch next to Firewall Rules to enable the feature.
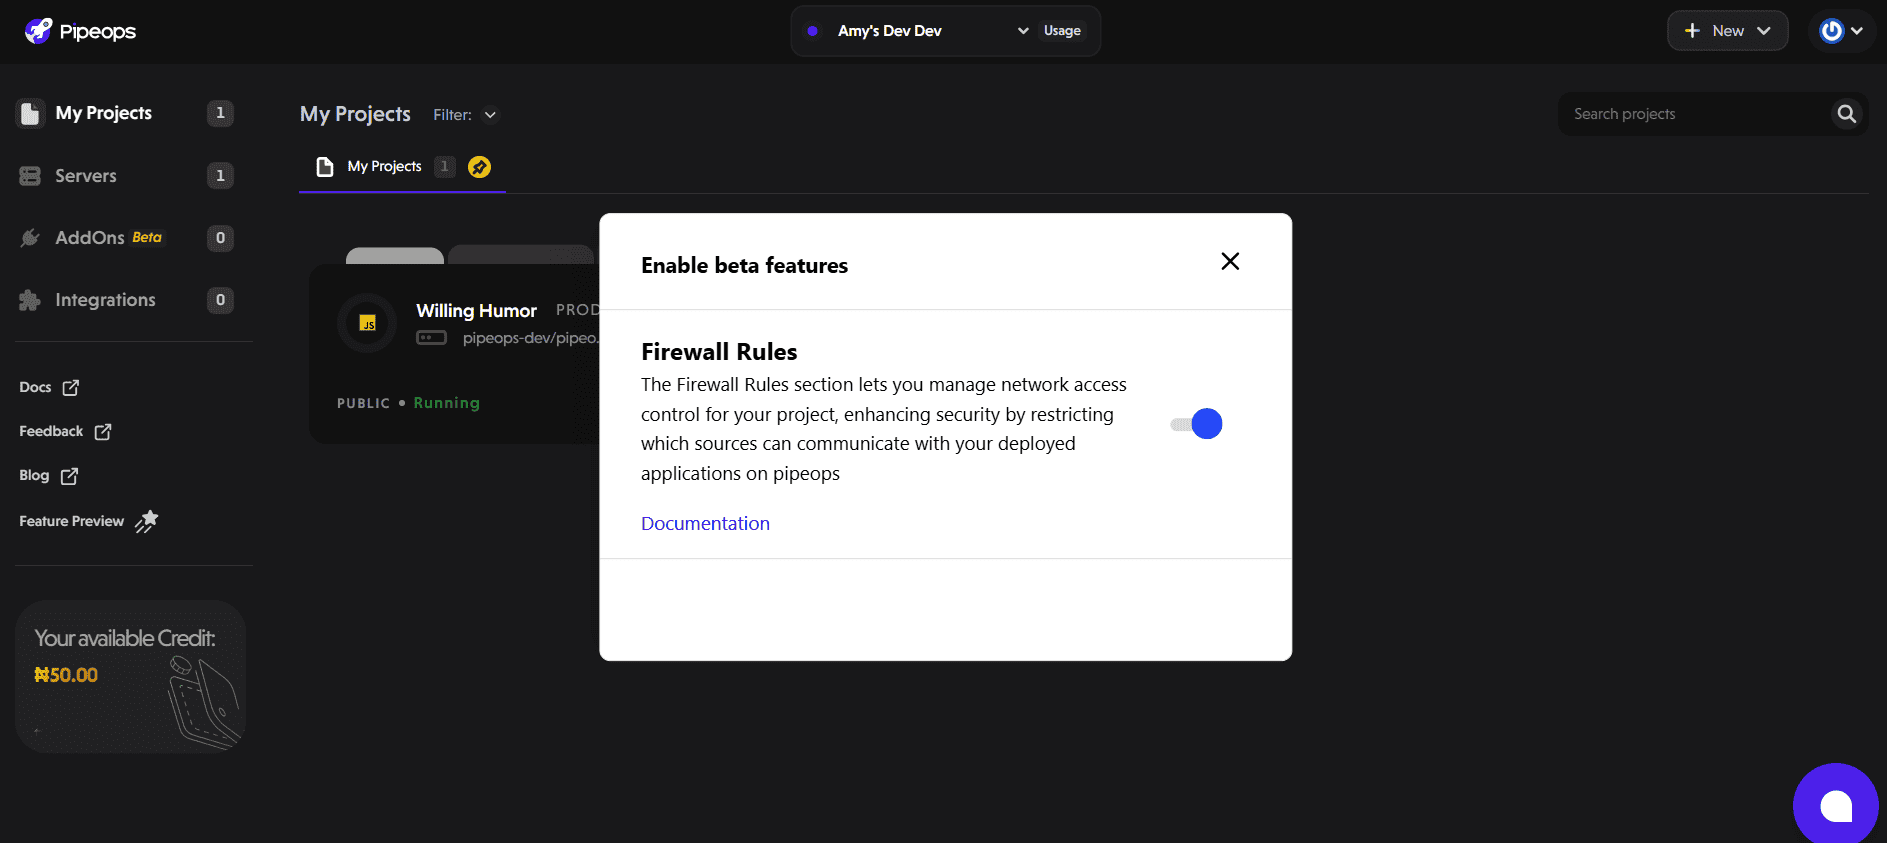
Once enabled, the Firewall Rules section will appear in your project settings.
Accessing Firewall Configuration
PipeOps provides a simple interface for setting up firewall rules directly within your project settings.
These rules allow you to define which IP addresses or CIDR blocks can access your deployment, and which ports and protocols are permitted for communication.
To access firewall configuration:
-
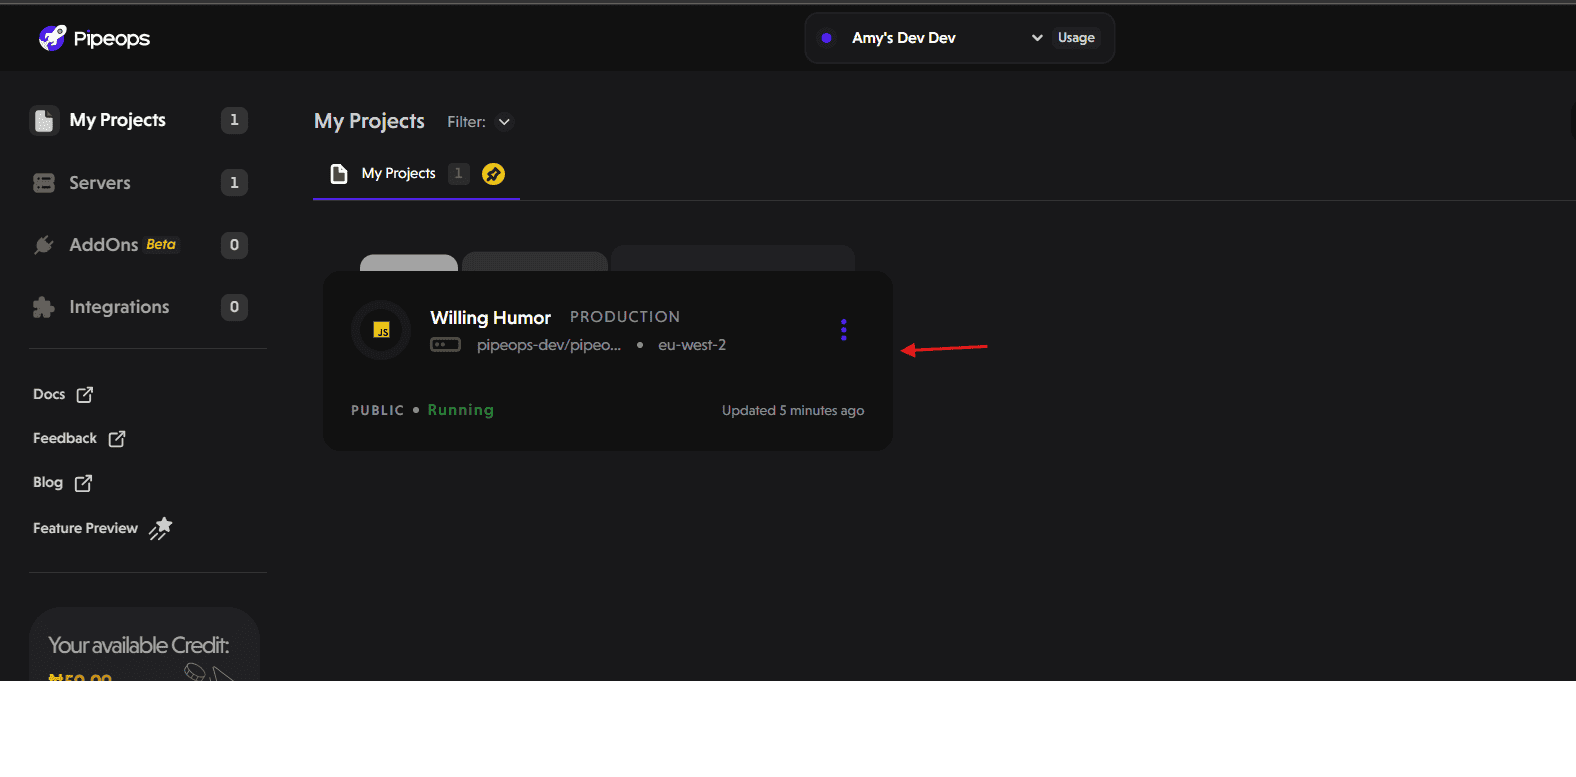
Go to your project dashboard on PipeOps.
-
Select the project you want to configure.
- Open the Project Settings tab and choose Firewall Rules from the sidebar.
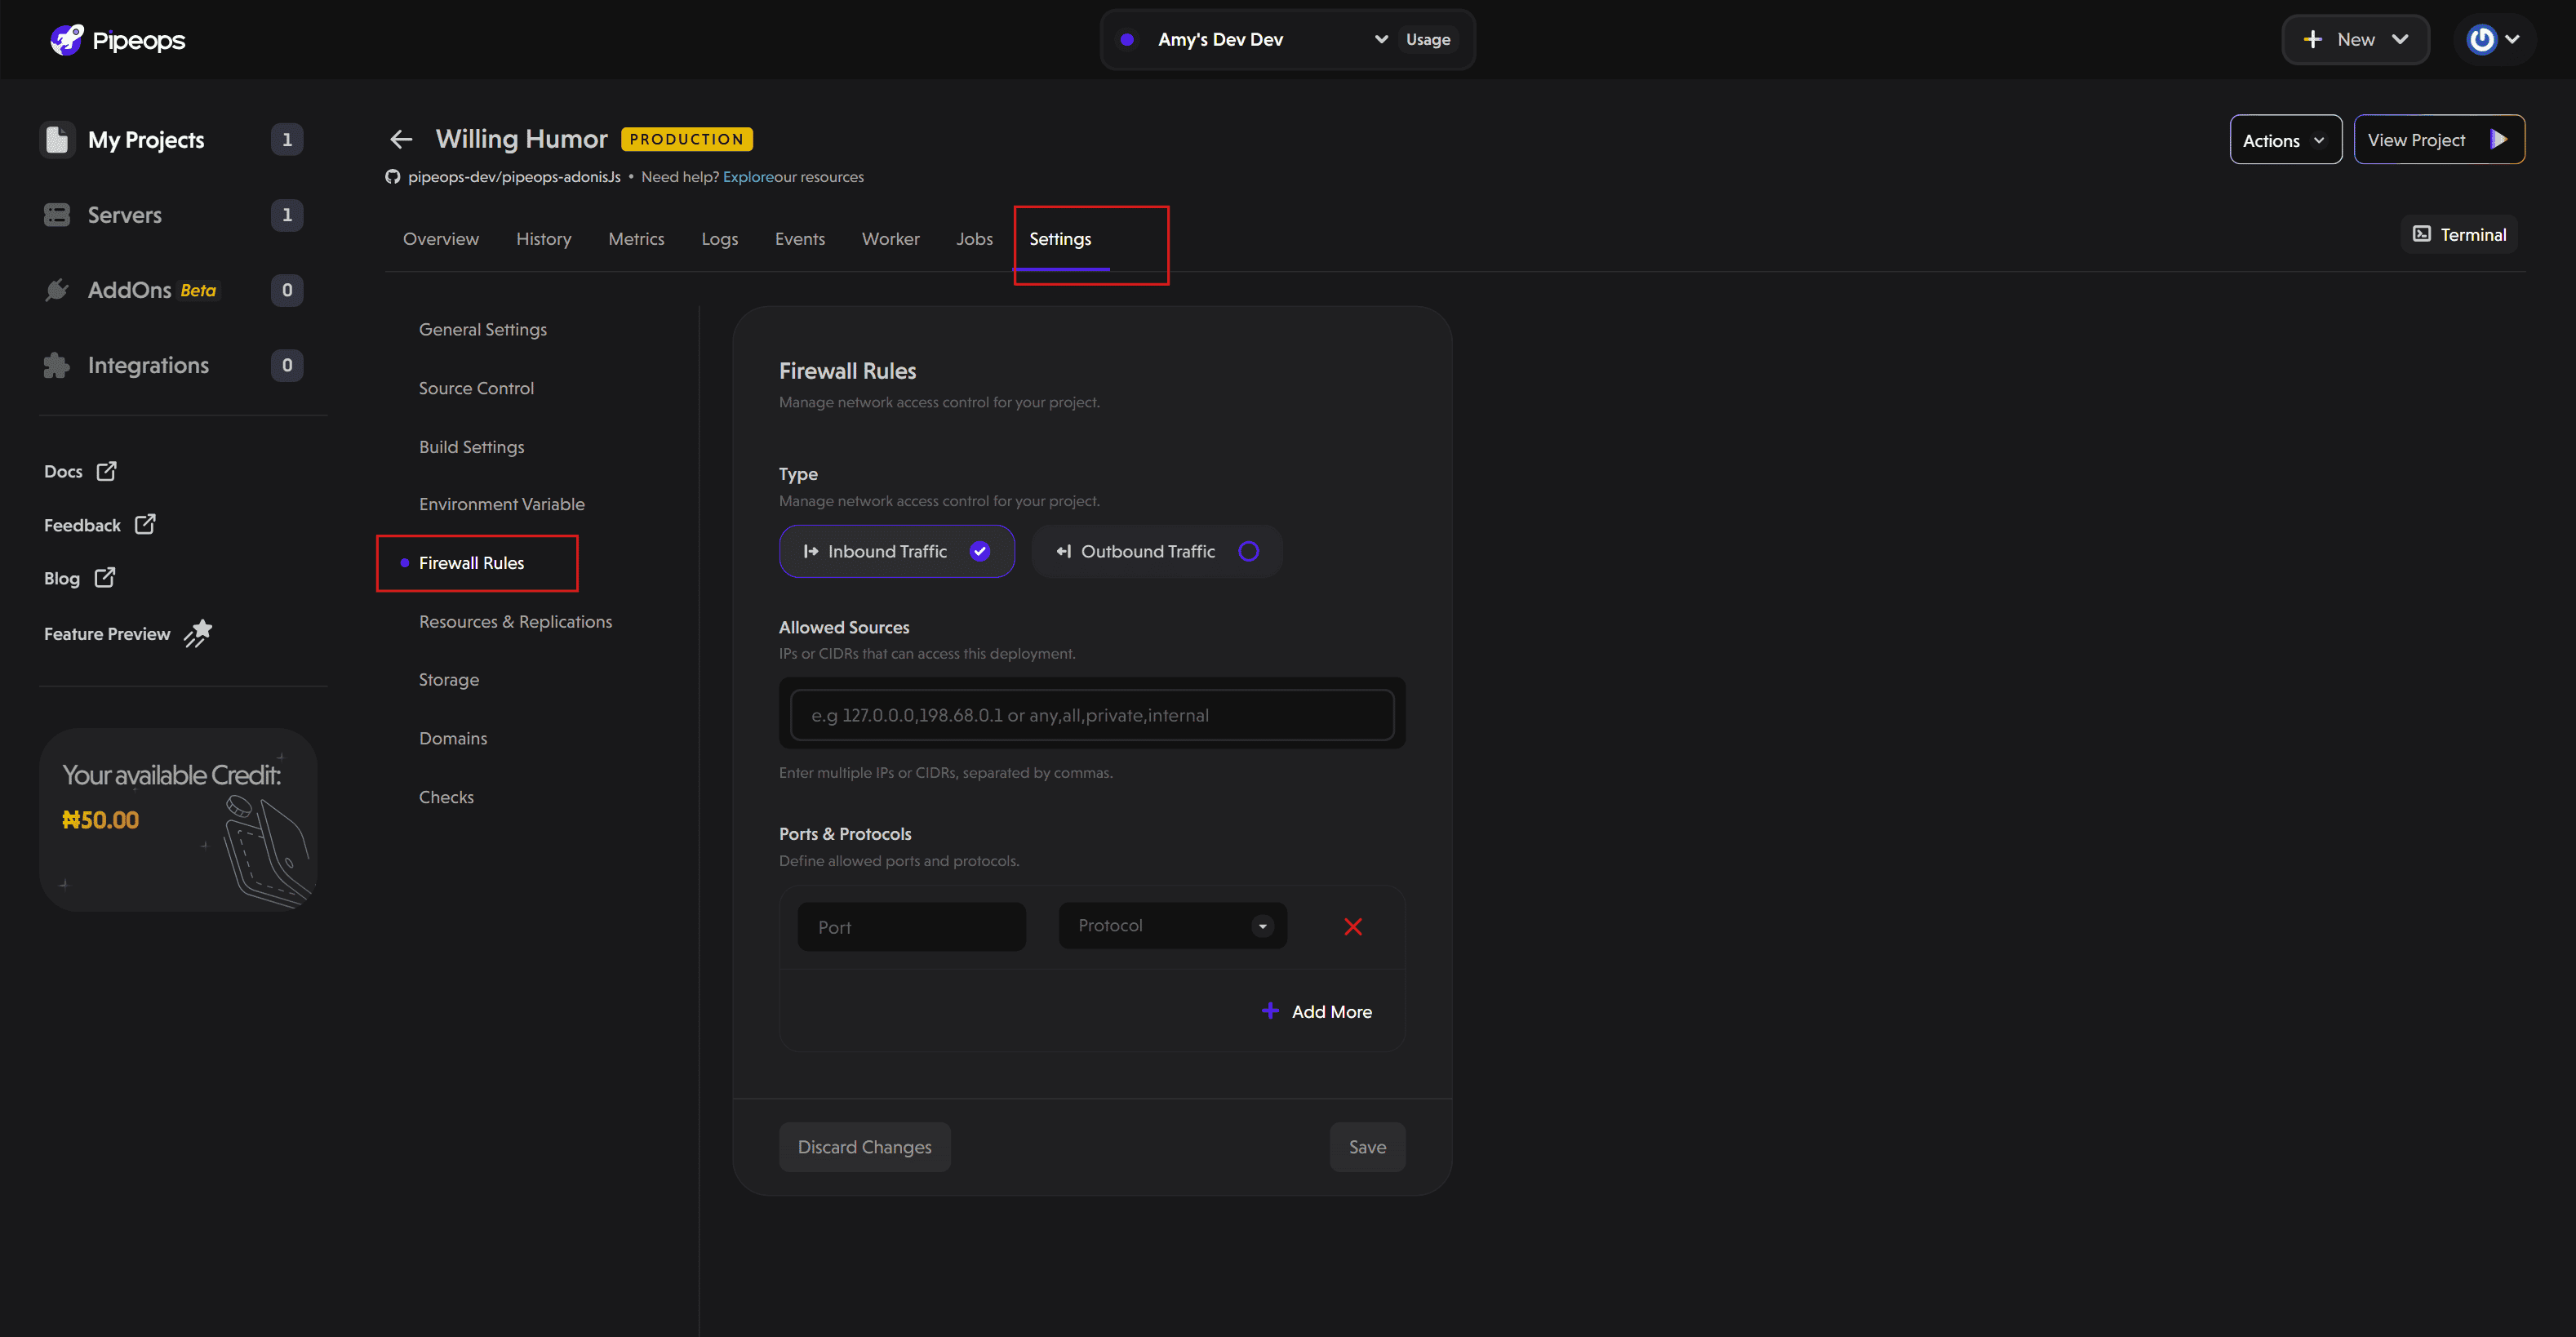
Configuring Firewall Rules
Select Network Traffic Direction
PipeOps lets you configure rules for:
-
Inbound Traffic: Controls which sources can send requests to your application.
-
Outbound Traffic: Controls which destinations your application can send traffic to.
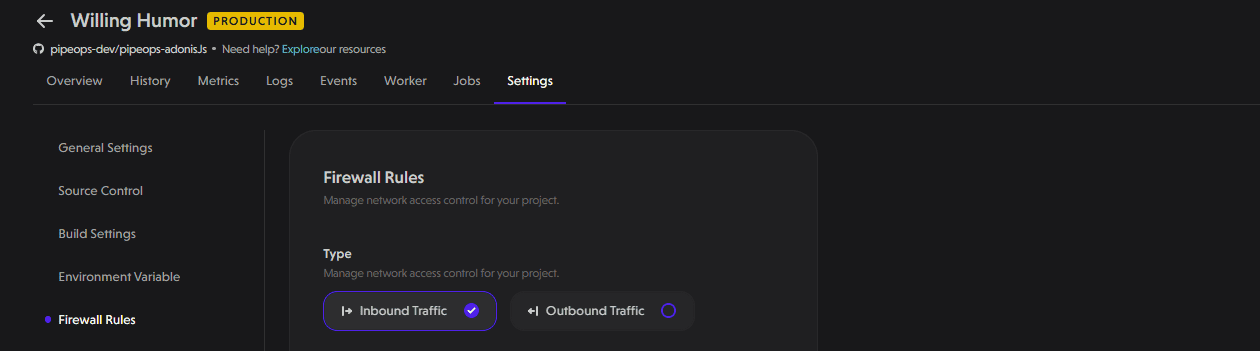
Click on the Inbound Traffic or Outbound Traffic tab to configure rules for each direction.
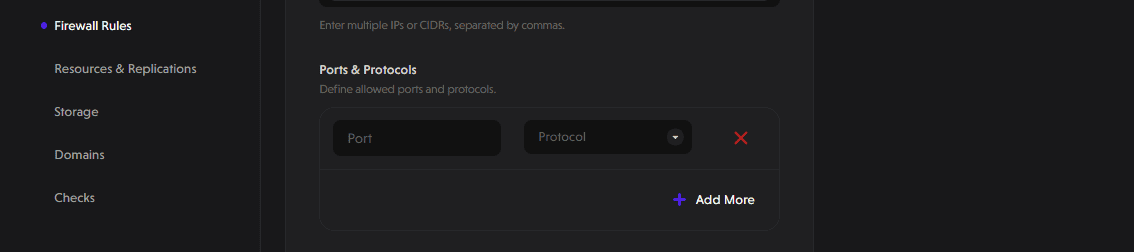
Define Allowed Sources
Specify which IP addresses or CIDR blocks should be allowed. CIDR blocks allow you to define a range of IP addresses. For example, 10.0.5.0/24 applies your policy to all IP addresses from 10.0.5.0 to 10.0.5.255.

You can also:
-
Enter multiple IPs separated by commas
-
Use predefined keywords like:
-
any/all – allows traffic from all sources
-
internal – enables secure inter-service communication within your project
-
Specify Ports and Protocols
Enter the port number and select the protocol (TCP/UDP).
Expose multiple ports as needed using the Add More button.
Save and Apply
After configuring your rules, click Save to enforce them.
Demo: Applying a Firewall Policy
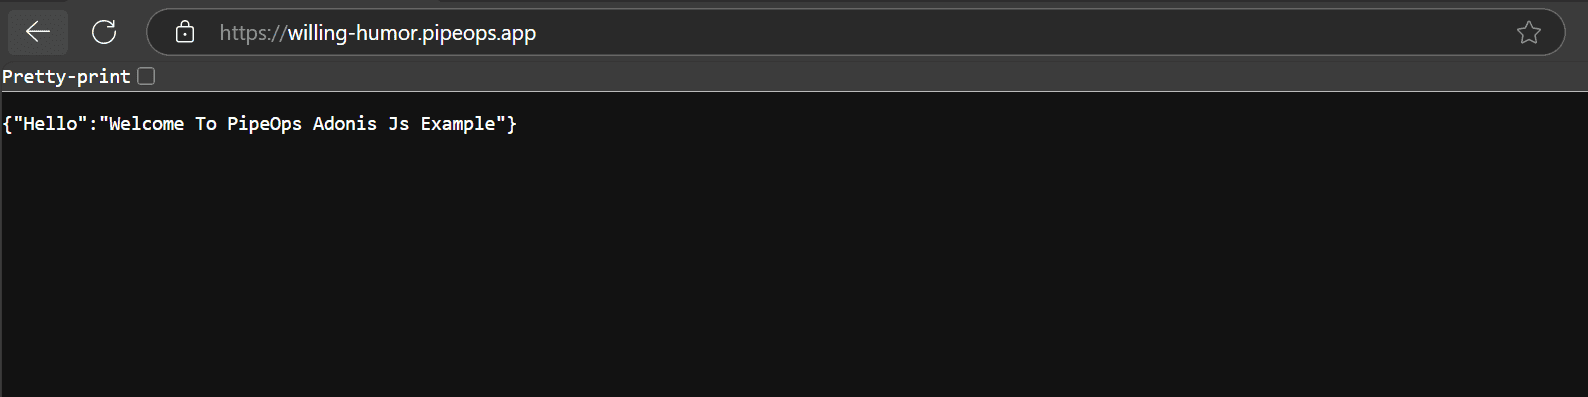
We’ve just deployed a sample Adonis project on PipeOps. The app is open to everyone by default. In this example, we’ll tighten security by enforcing firewall rules.
When we click the “View Project” button, the application is publicly accessible. Anyone with the link can access it.

For this demonstration, we’ll restrict inbound traffic to only allow connections from my IP address over port 443.
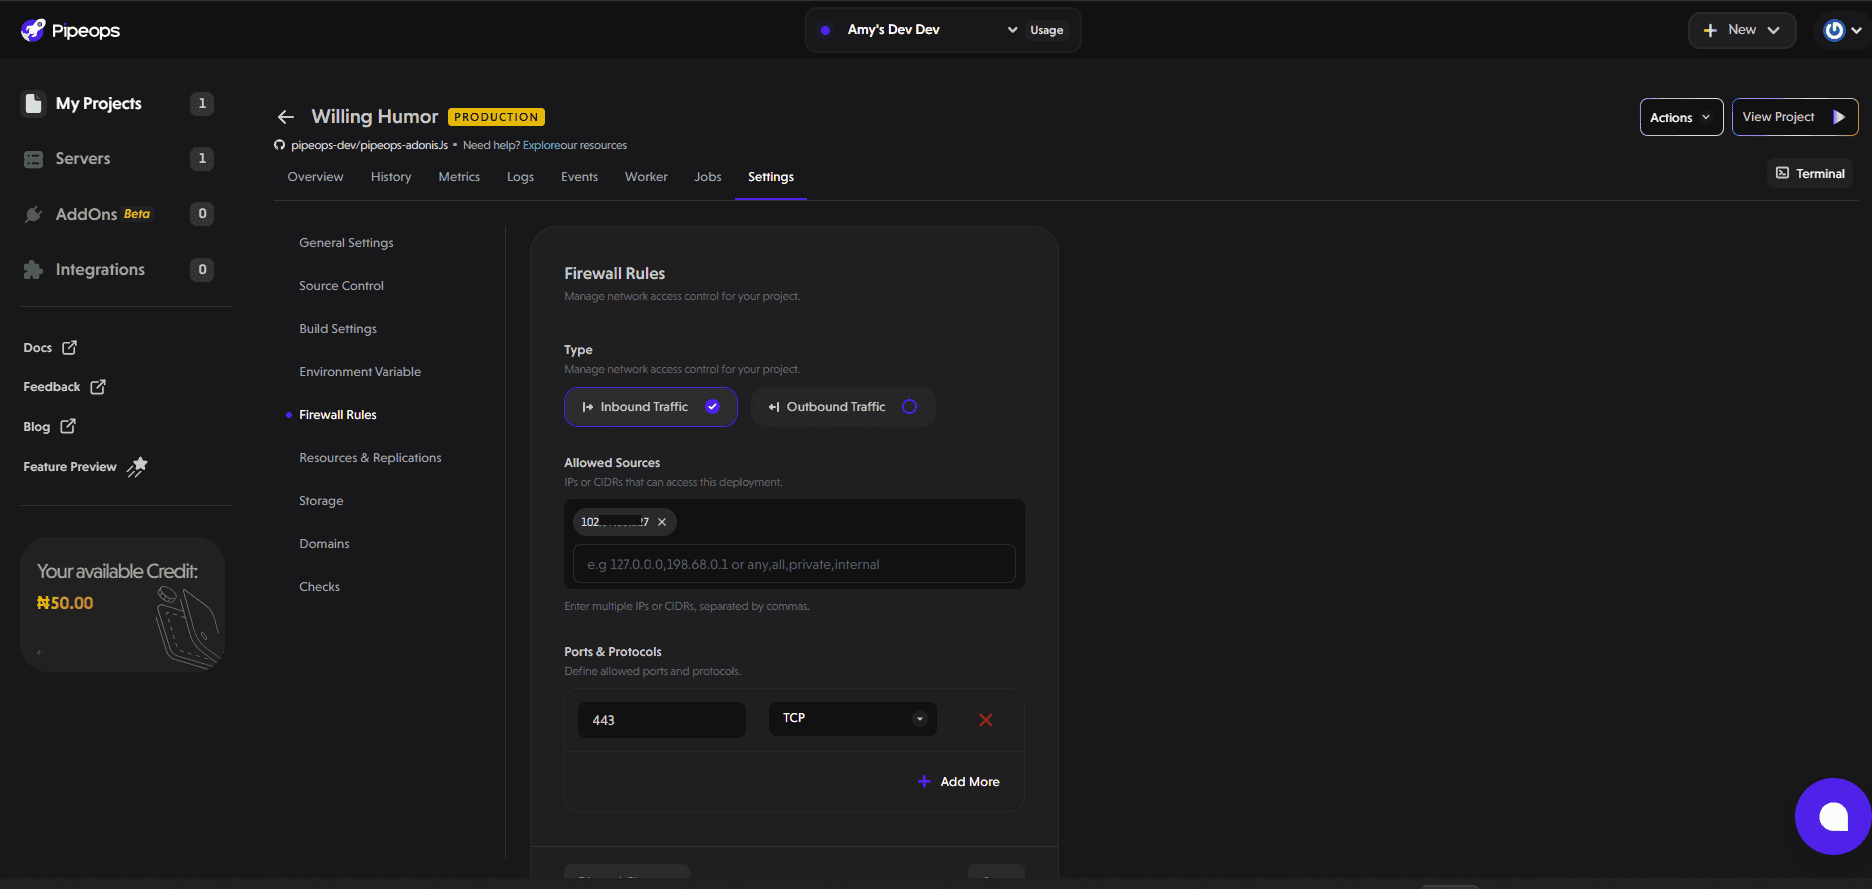
After applying the firewall rule, only requests from the allowed IP can access the project. All other requests will receive a 403 error.
To confirm the restriction, we’ll test access from a different IP. As expected, the application returns a 403 error.

Securing Your Deployment with Confidence
Firewall rules secure your PipeOps deployments by precisely controlling inbound and outbound network traffic. By restricting access to trusted IP addresses and limiting communication to necessary ports, you significantly reduce your application’s exposure to unauthorized access.