How to Collaborate on PipeOps Projects
Effective collaboration is the backbone of any successful technical project. Whether you're managing a small development team or coordinating across multiple departments, PipeOps provides the tools you need to work with different users. This guide will walk you through how to set up and manage collaborative projects effectively.
PipeOps Workspaces
Think of workspaces as separate organizations or units within PipeOps. A workspace is a container for projects, teams, servers, and integrations. This is particularly powerful for:
- Multi-client agencies: Separate workspace for each client
- Enterprise organizations: Different workspaces for different business units
- Project-based companies: Dedicated workspace per major project
- Personal vs. professional separation: Keep your side projects separate from work
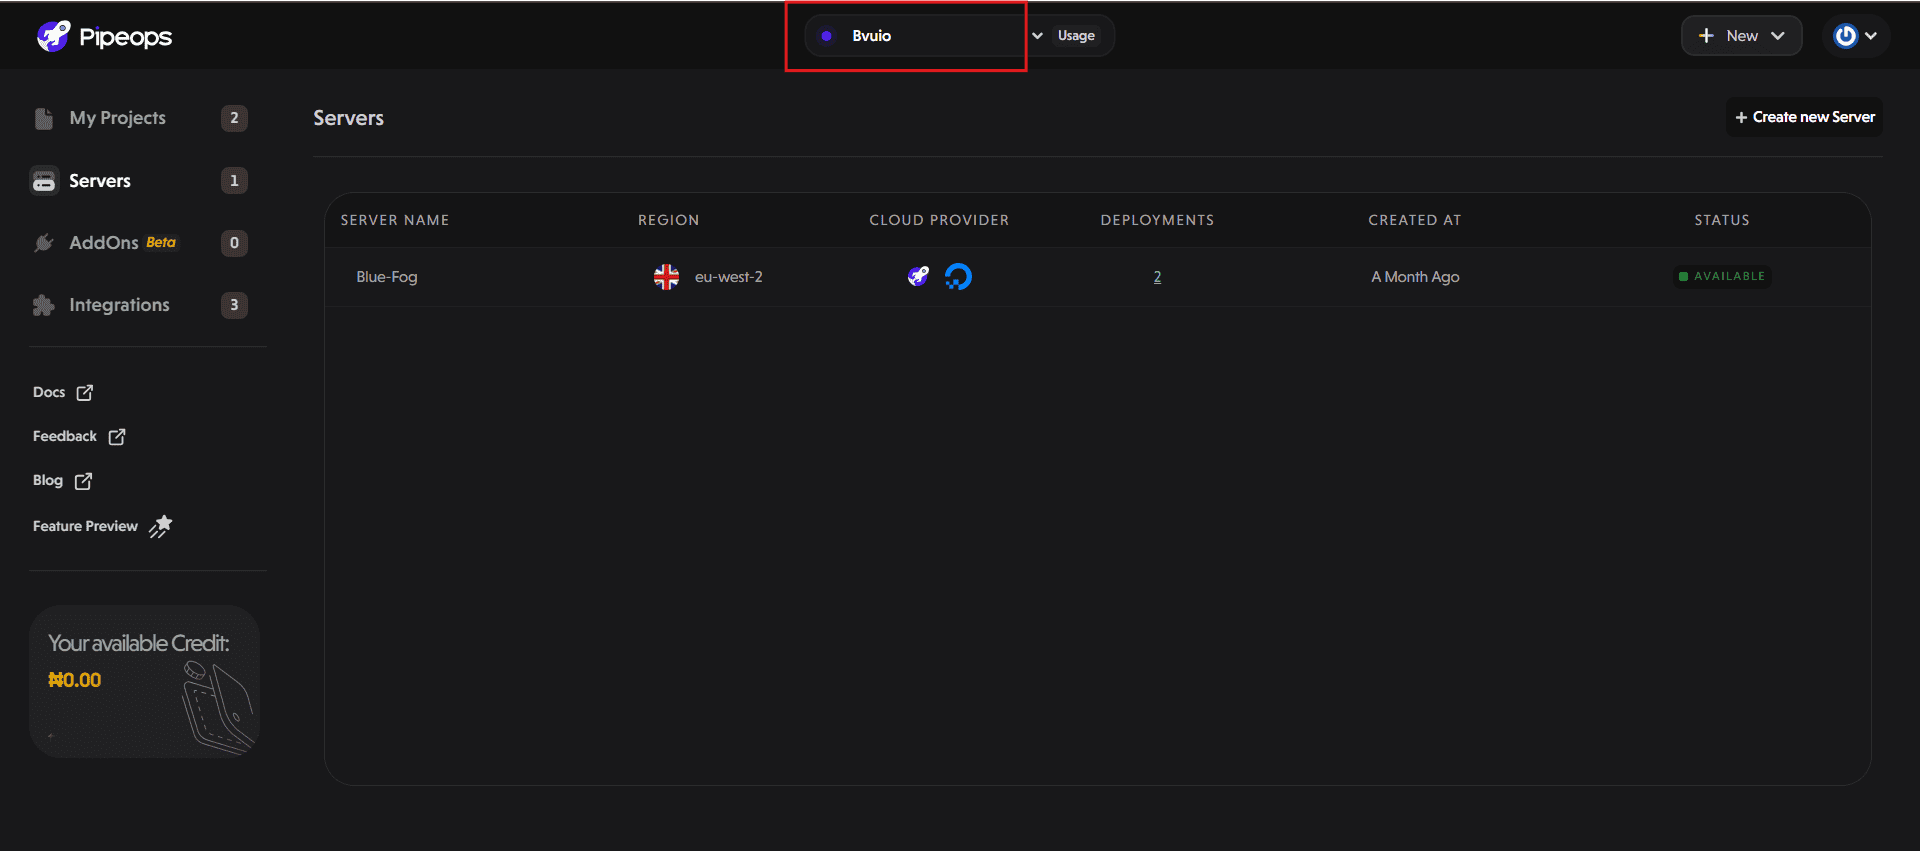
You can switch between them using the Workspace tab in the top nav.
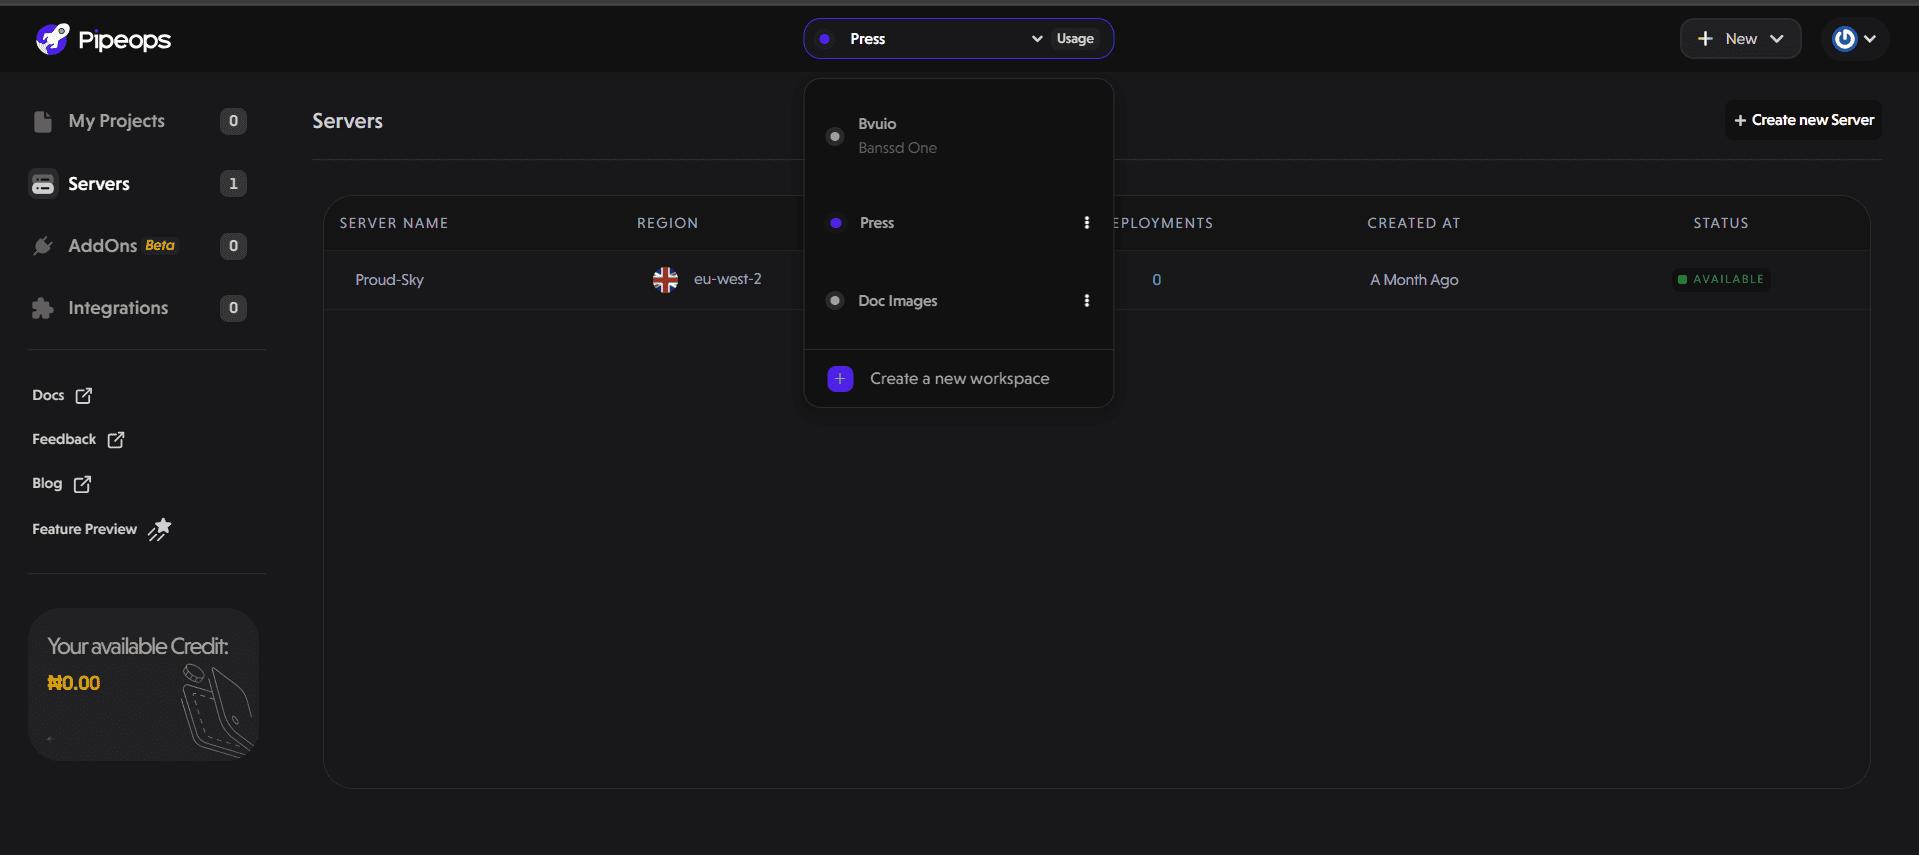
Setting Up Workspaces
Your PipeOps account comes with a default workspace. To create a new one:
- Click on the workspace tab in the top navbar
- Select "Create New Workspace" from the dropdown
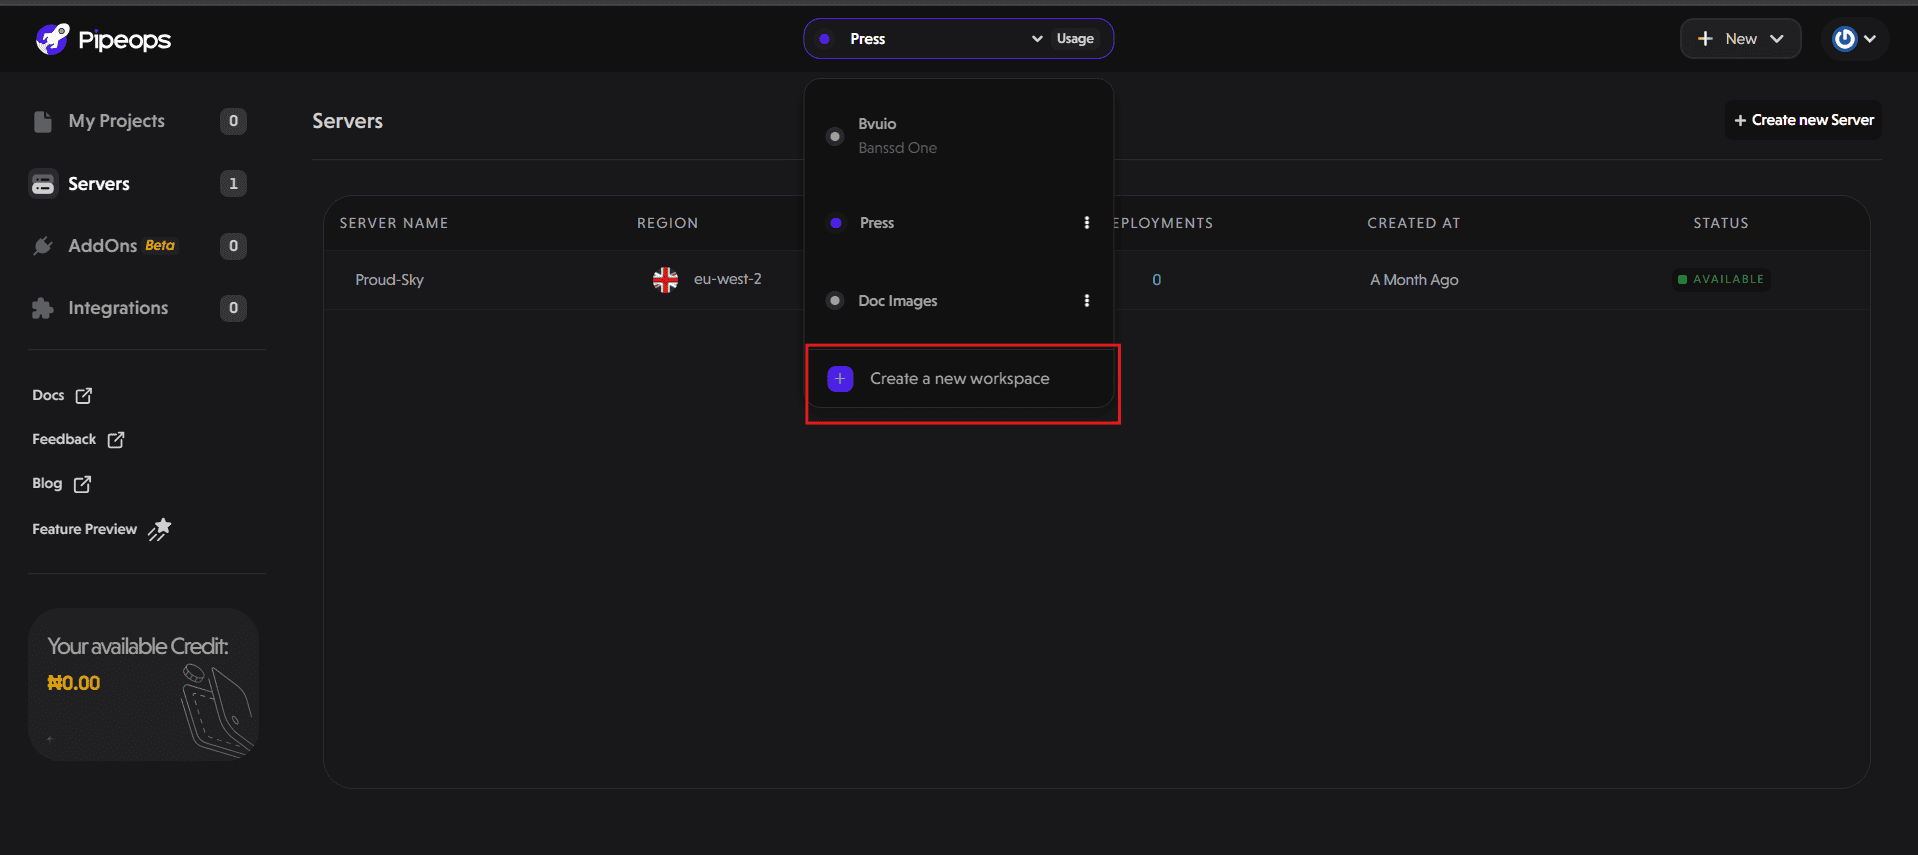
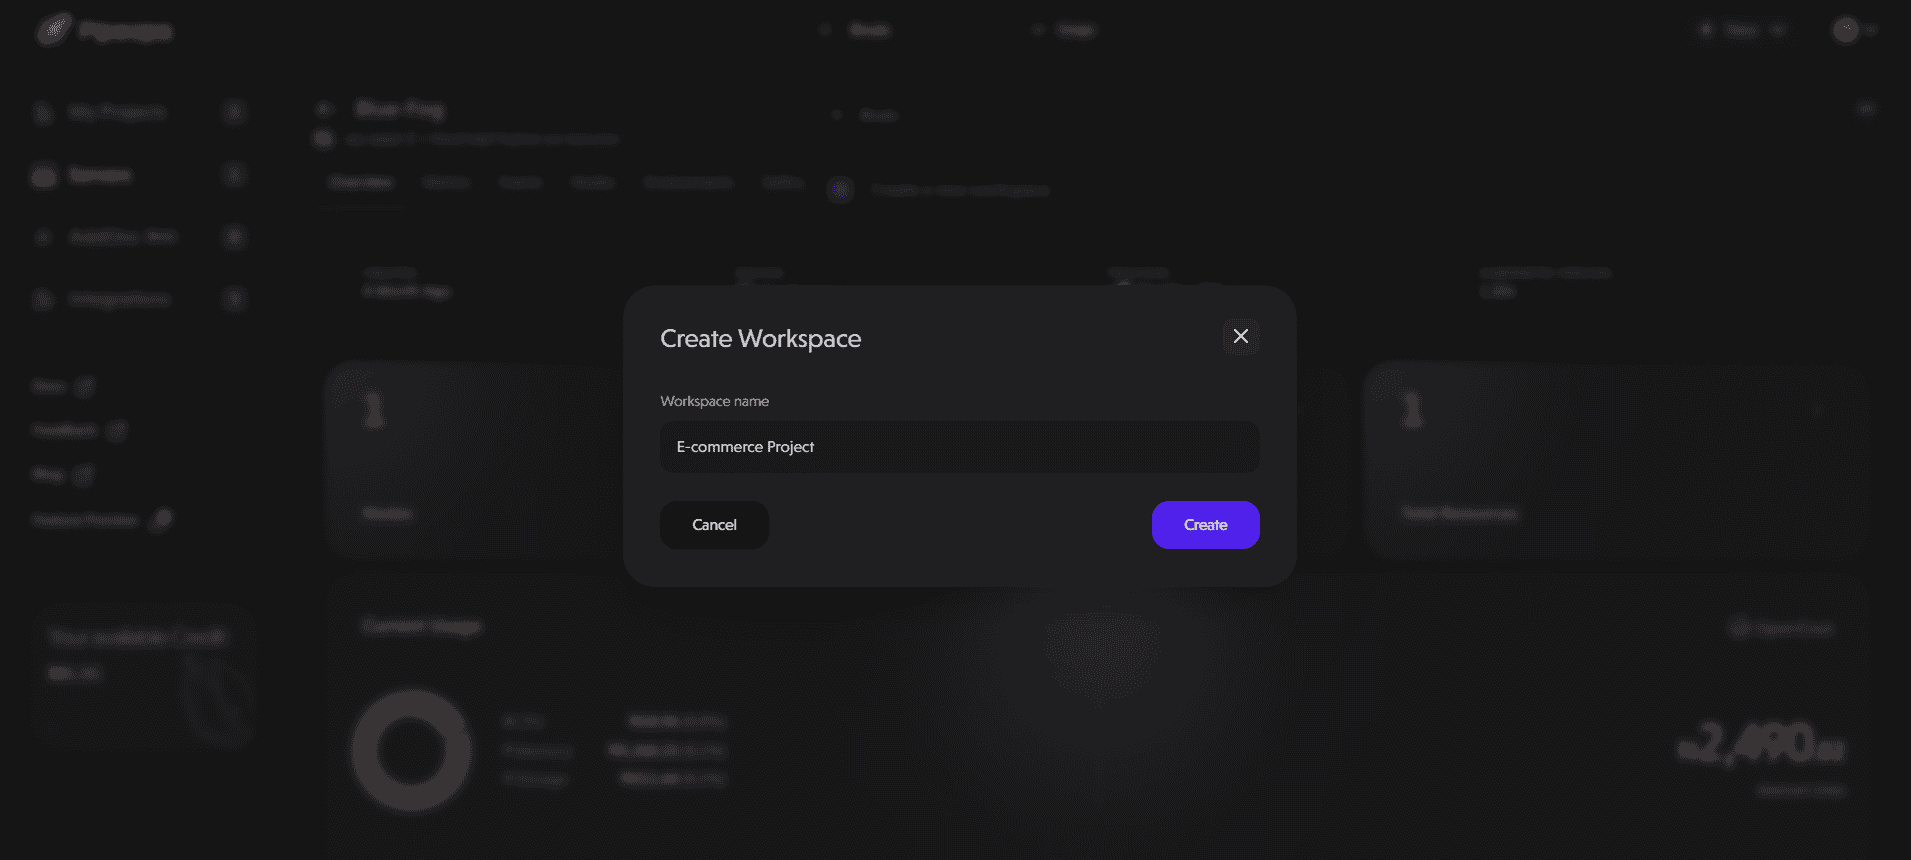
- Enter a workspace name and click Create.
Setting Up Teams within Workspaces
To begin collaborating on PipeOps, you need to set up your team within your workspace. Here’s how to do that:
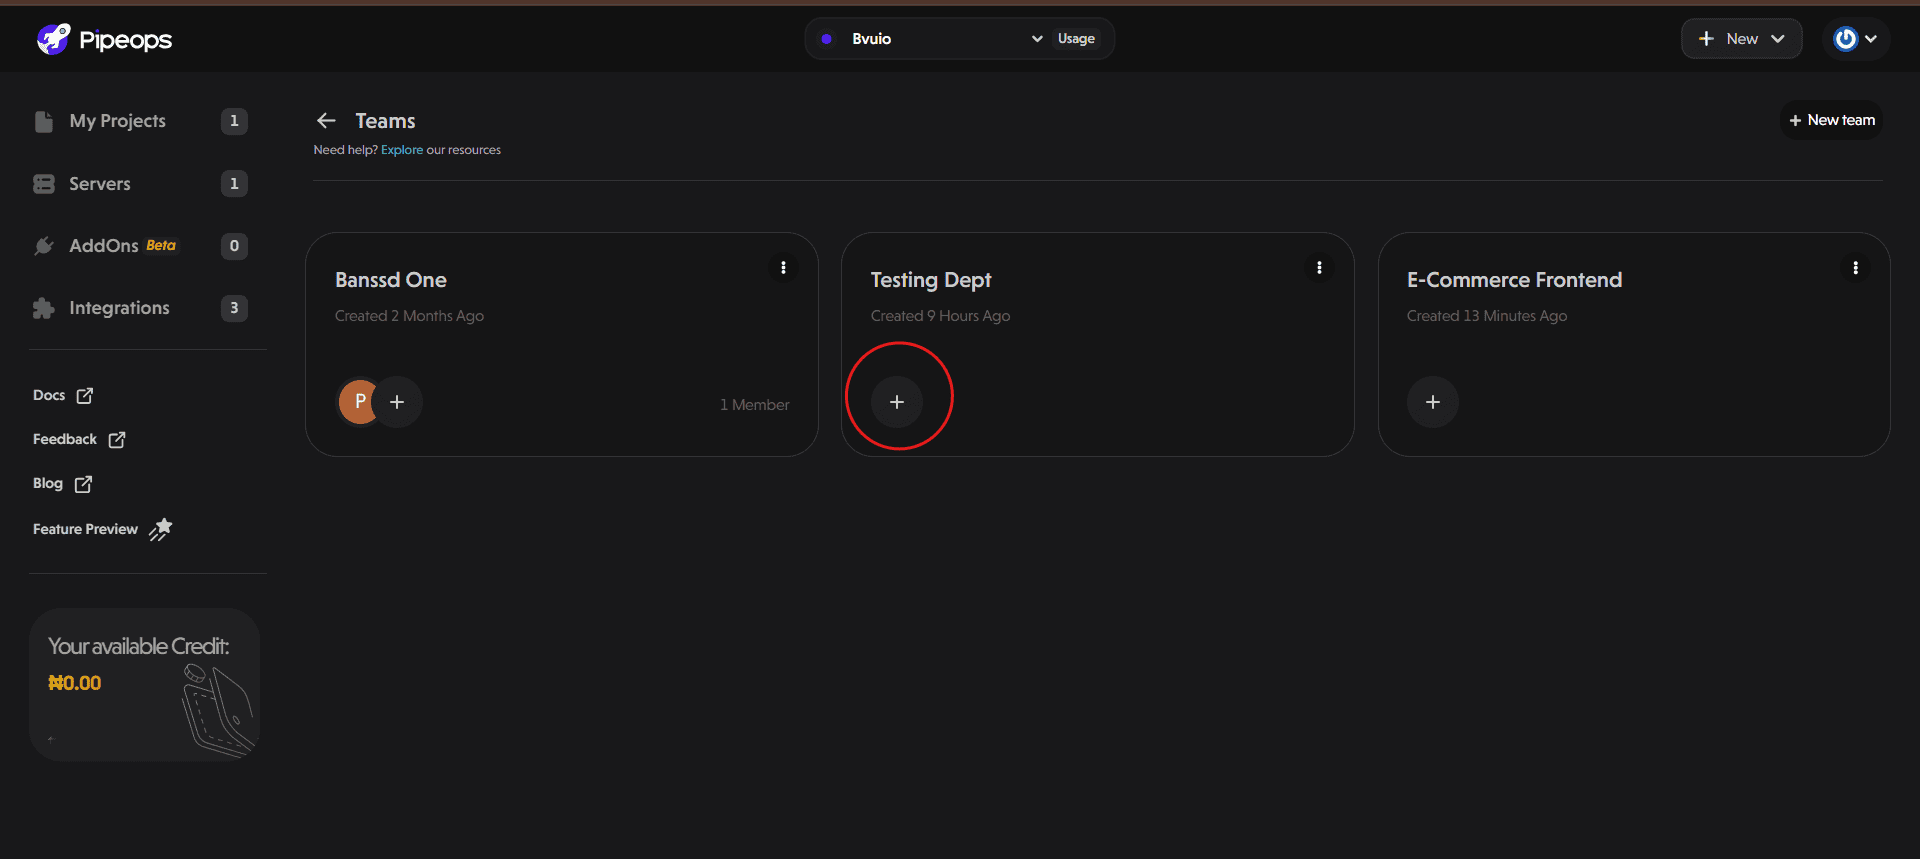
Creating a Team
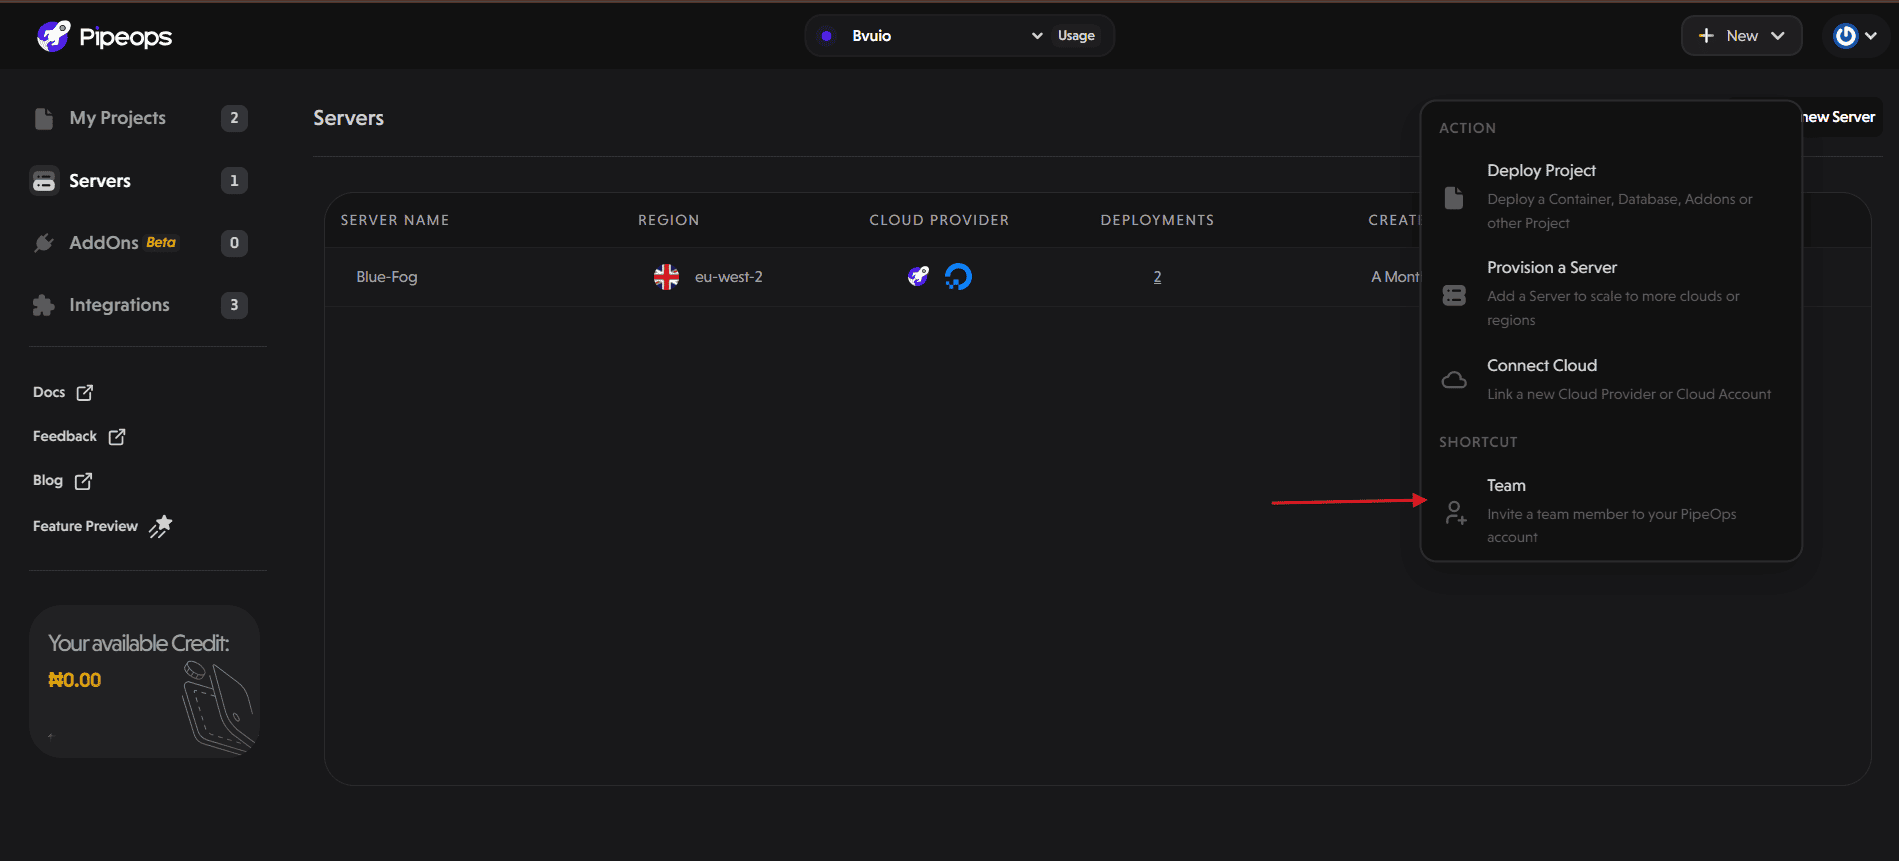
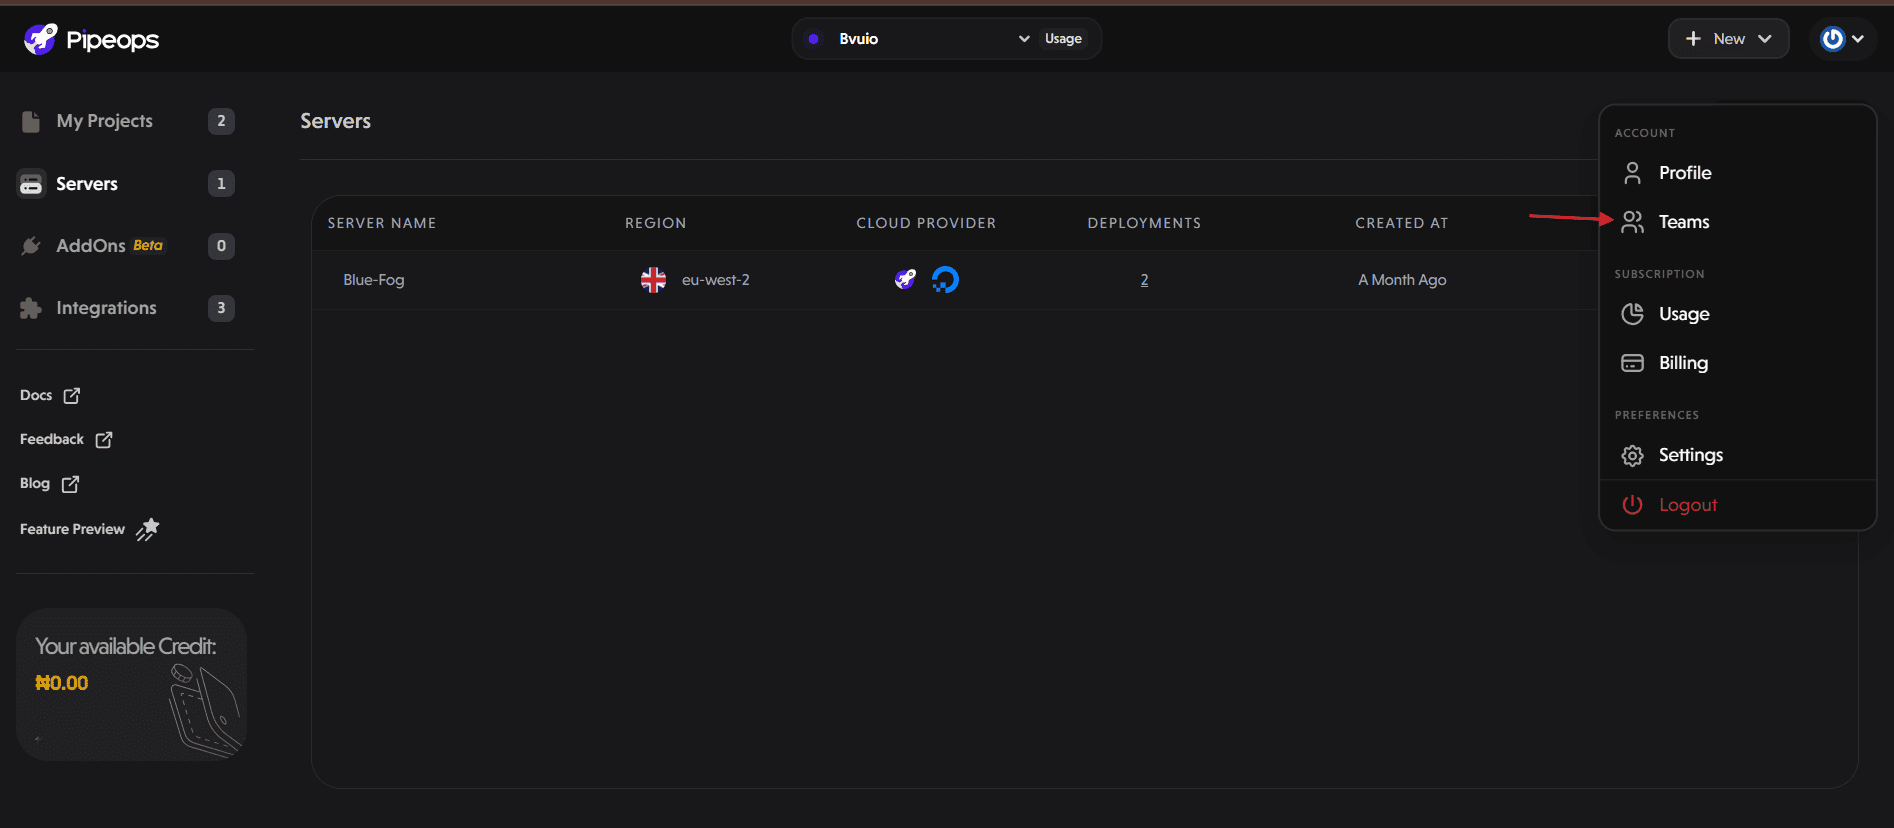
- Click the ‘’New” button on the top right corner of your dashboard and select “Team” from the dropdown menu. Alternatively, click on the profile icon, and select “Teams” from the dropdown.
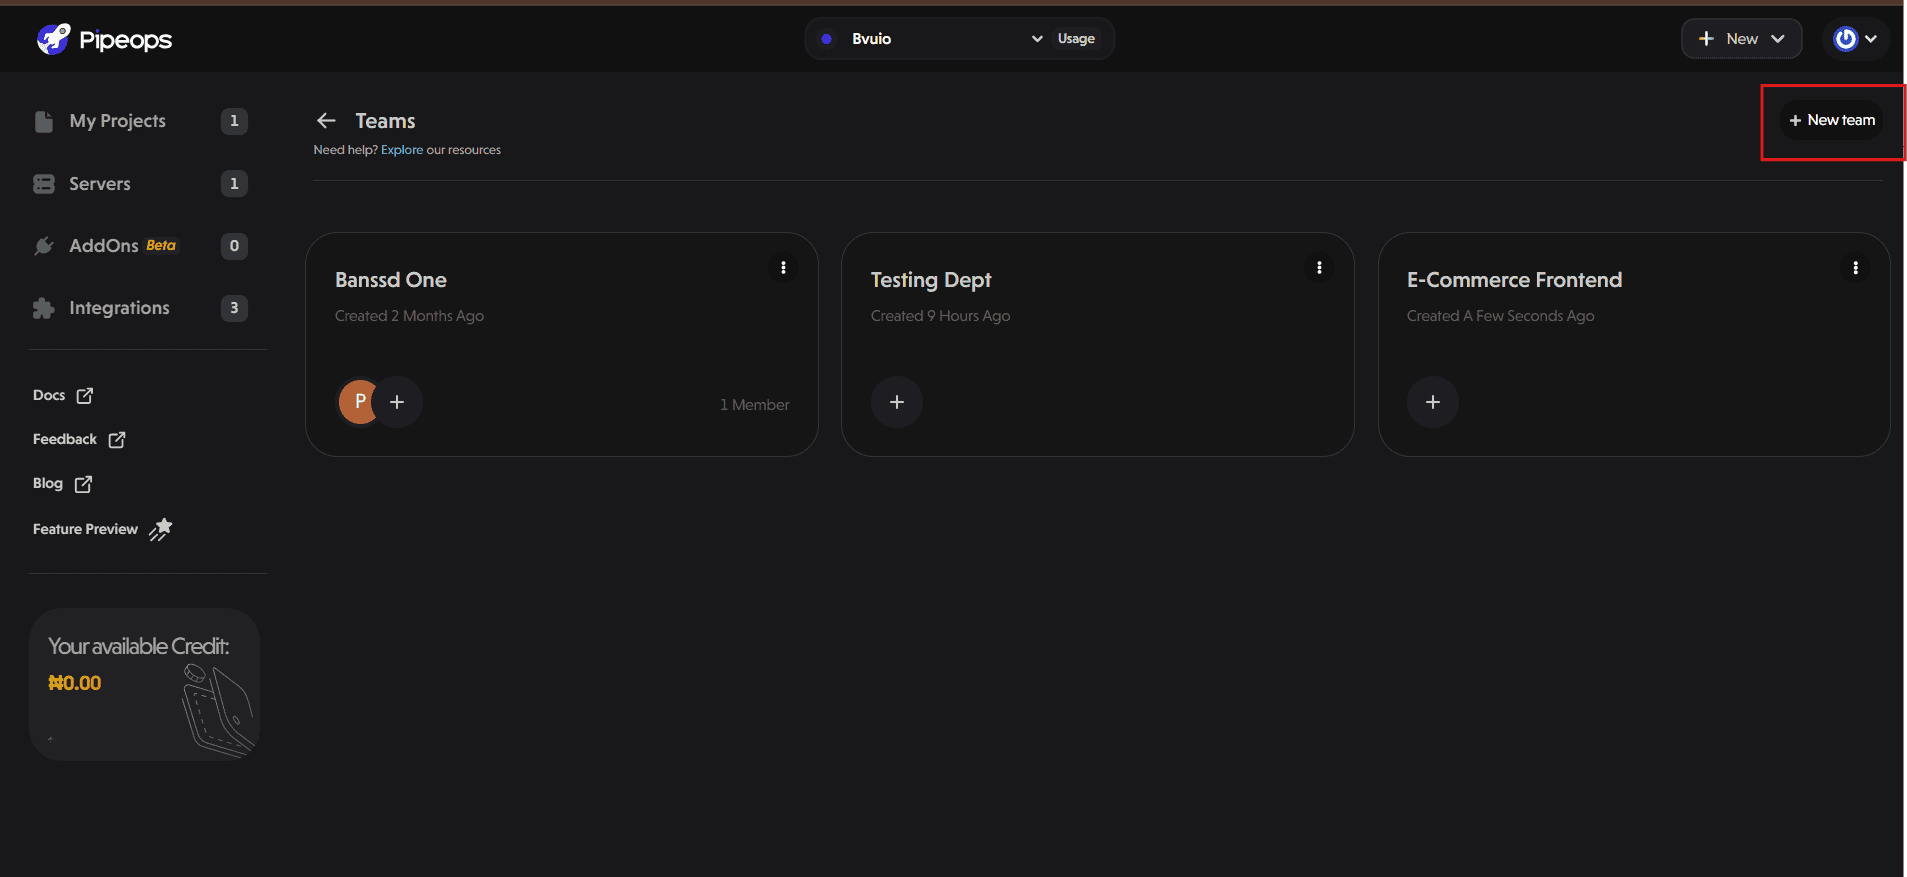
- On the teams page, click the "+ New team" button at the top-right of your screen. If you haven't created any teams yet, a "+ create a new team" button will be at the center of the page as well.
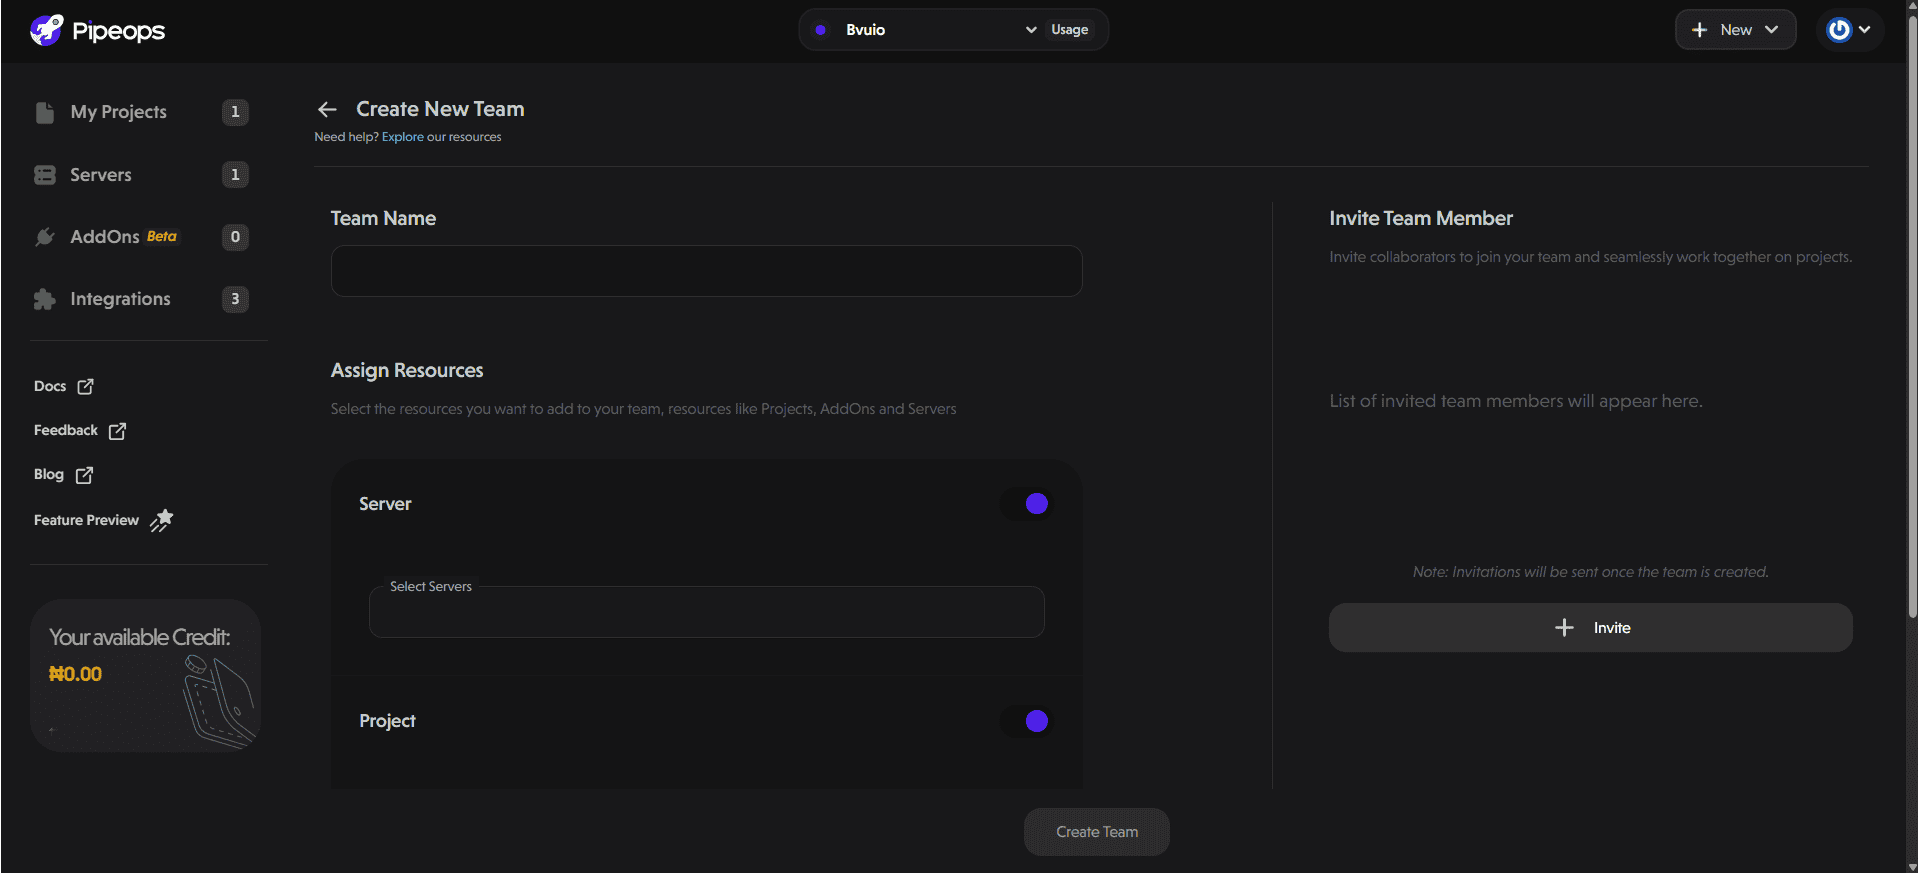
Fill in your team details:
-
Team Name: Give your team a name.
-
Assign Resources: Select the resources you want the team to access, such as servers, projects, and add-ons.
-
Click "Create Team" to complete your setup.
Inviting Team Members
Adding a member to your team is quick. You can use the "Invite Team Member" section during team creation. Alternatively, navigate to the desired team and click on the "+" icon.
A user-friendly form will appear, where you’ll provide the following information:
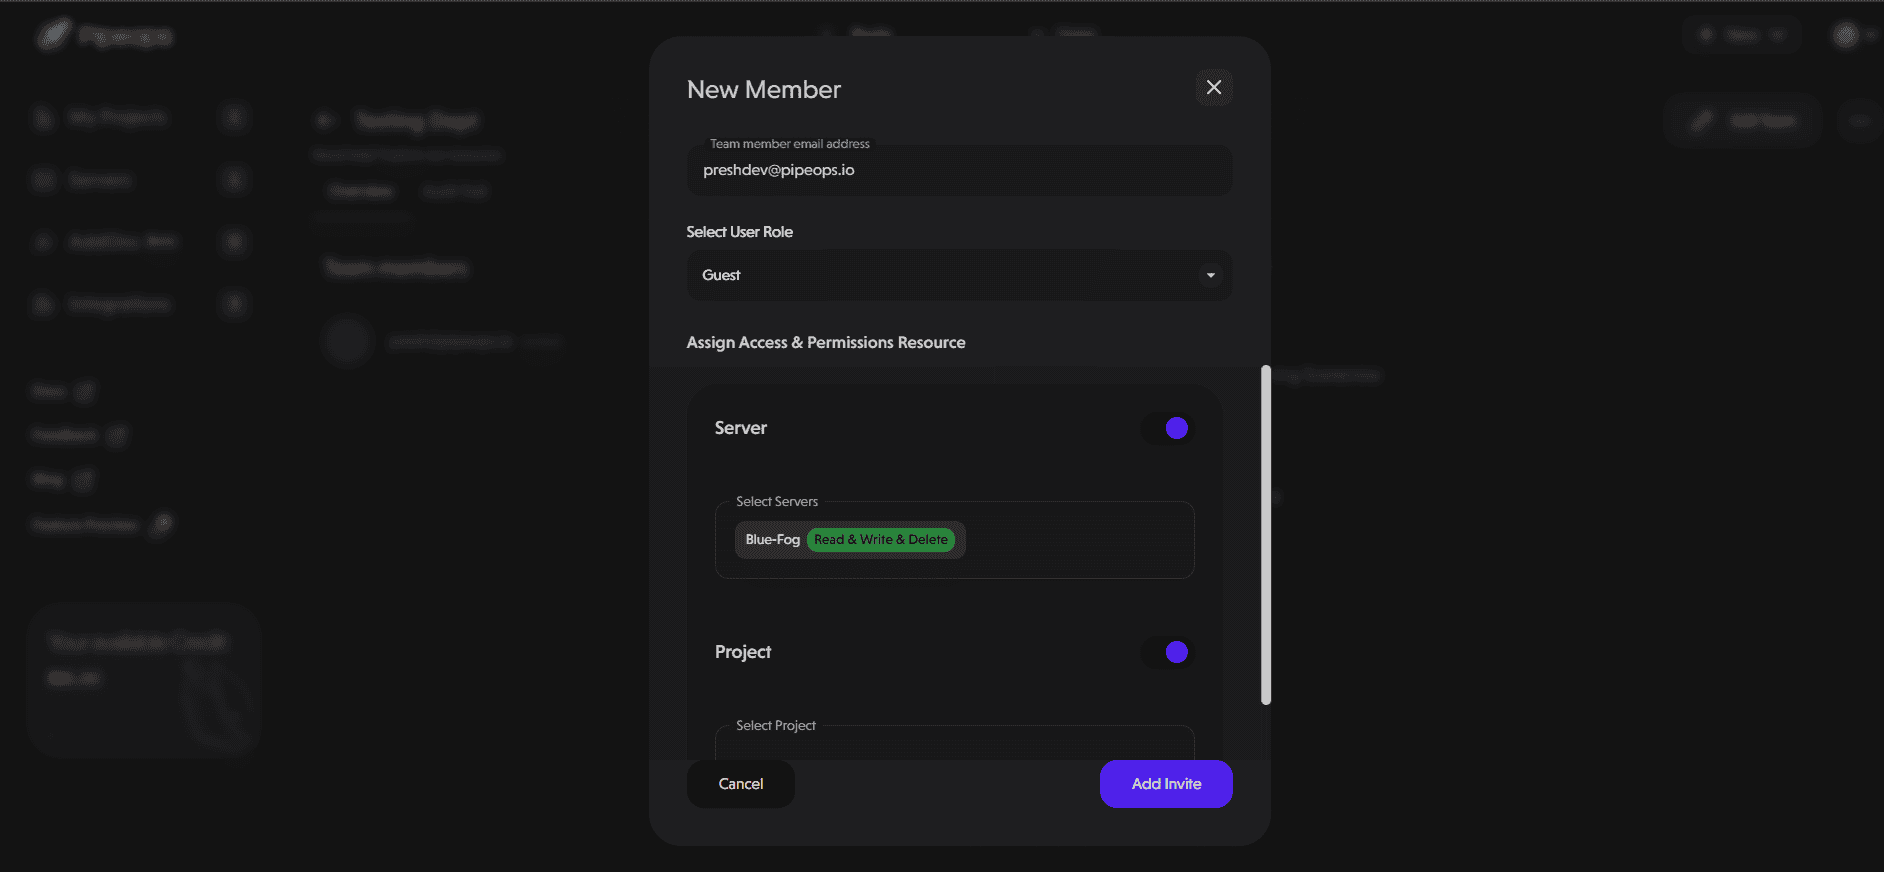
-
Team member's email address
-
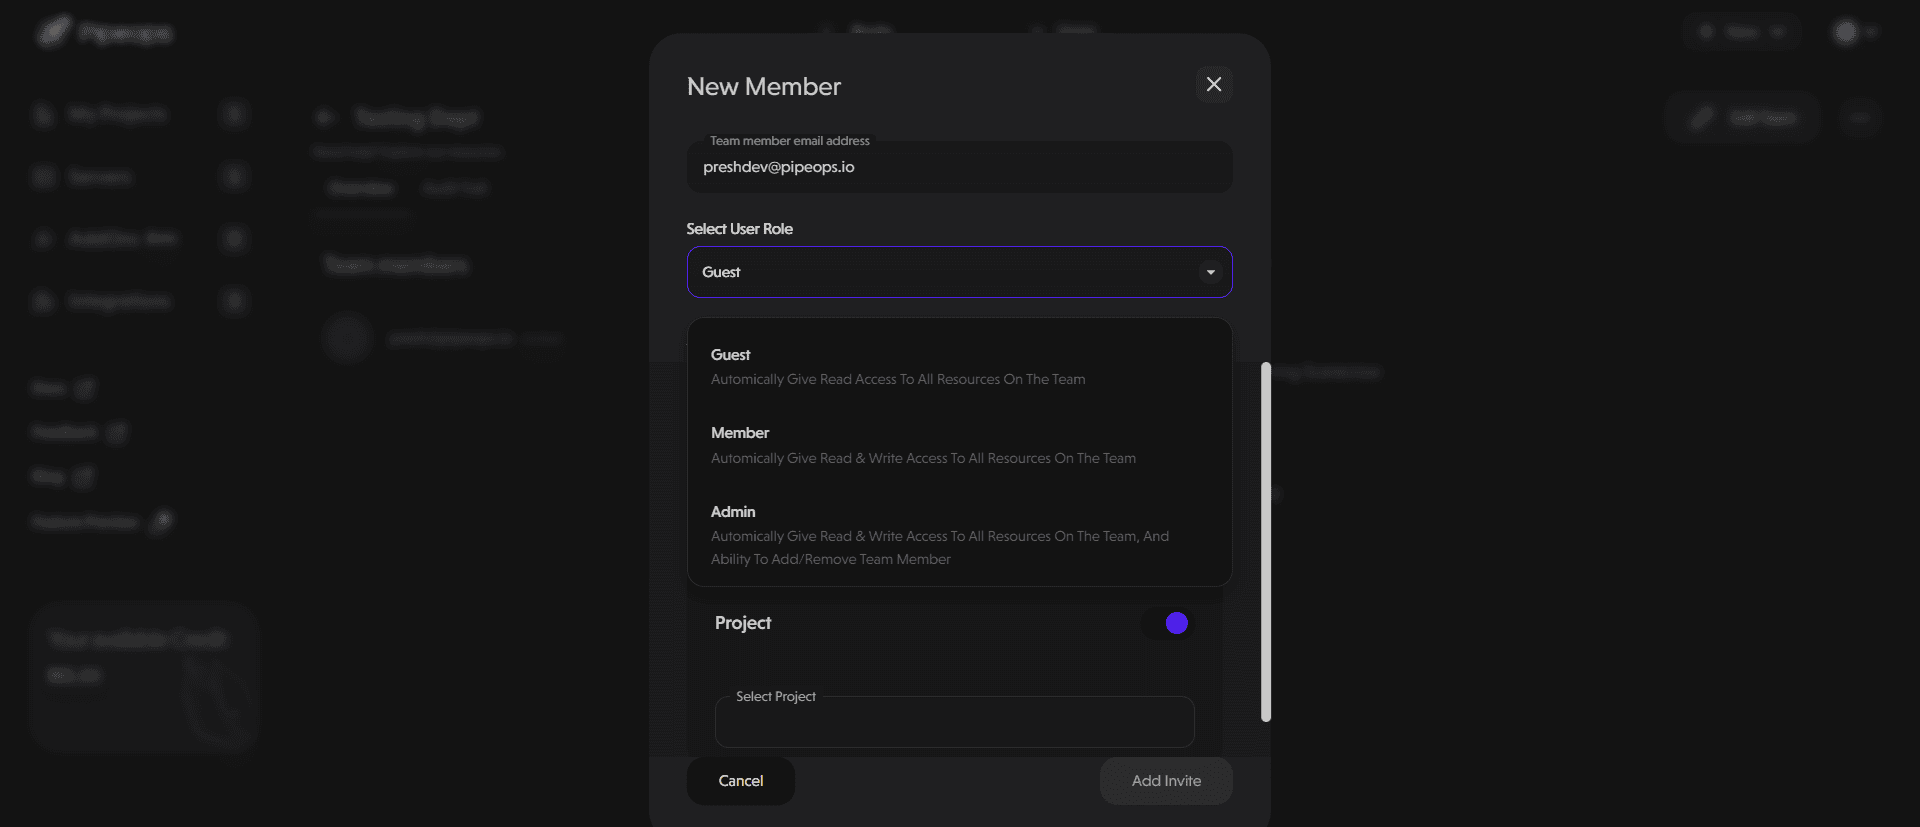
Select user role (guest, member, or admin):
Guest - this member gets read access to all resources
Member - read and write access to all resources in the team
Admin - read and write access to all resources in the team. The admin can also add or remove team members.
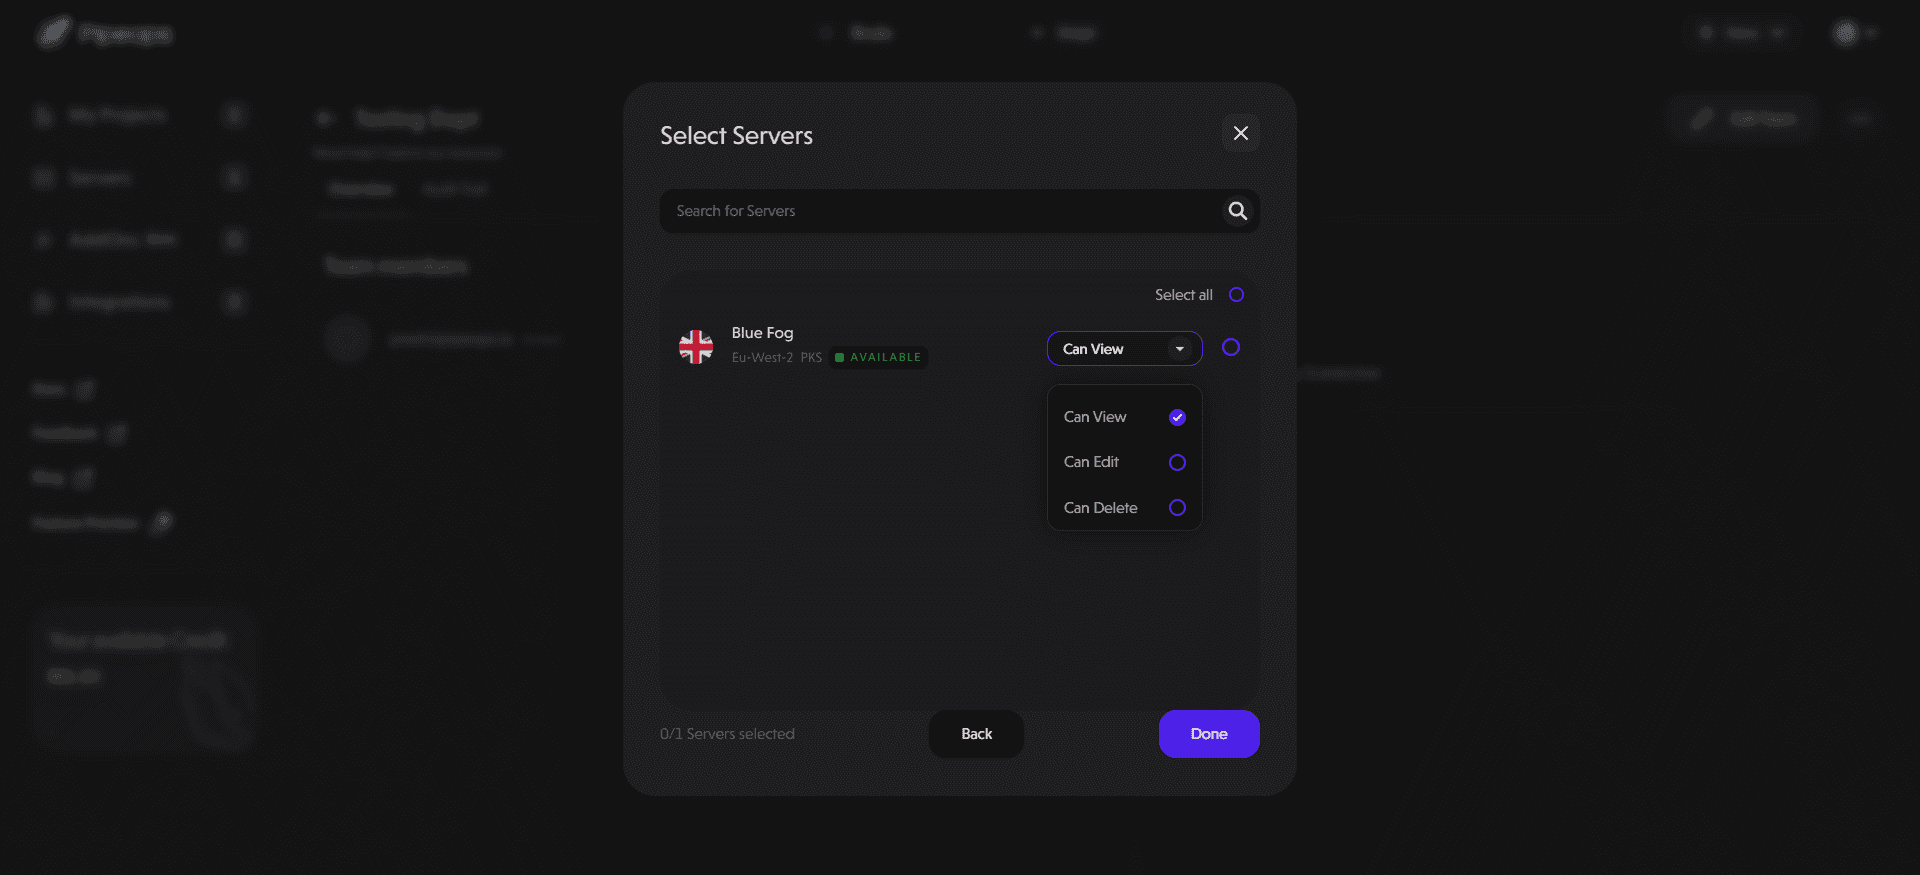
- Assign access and permission to specific resources
This section allows you to state the level of access each member has to each resource in your team. For each resource you select, you can choose if the member can view, edit, or delete.
-
Click the “Add invite” button to send the invitation.
Team members will receive an email invitation to join the team.
Utilizing Audit Trail
The Audit Trail feature provides a detailed record of all actions performed within a team, ensuring transparency and accountability.
To access the Audit Trail feature:
-
Navigate to the "Teams" section. Click on the specific team whose audit logs you wish to view.
-
Select the "Audit Trail" tab.
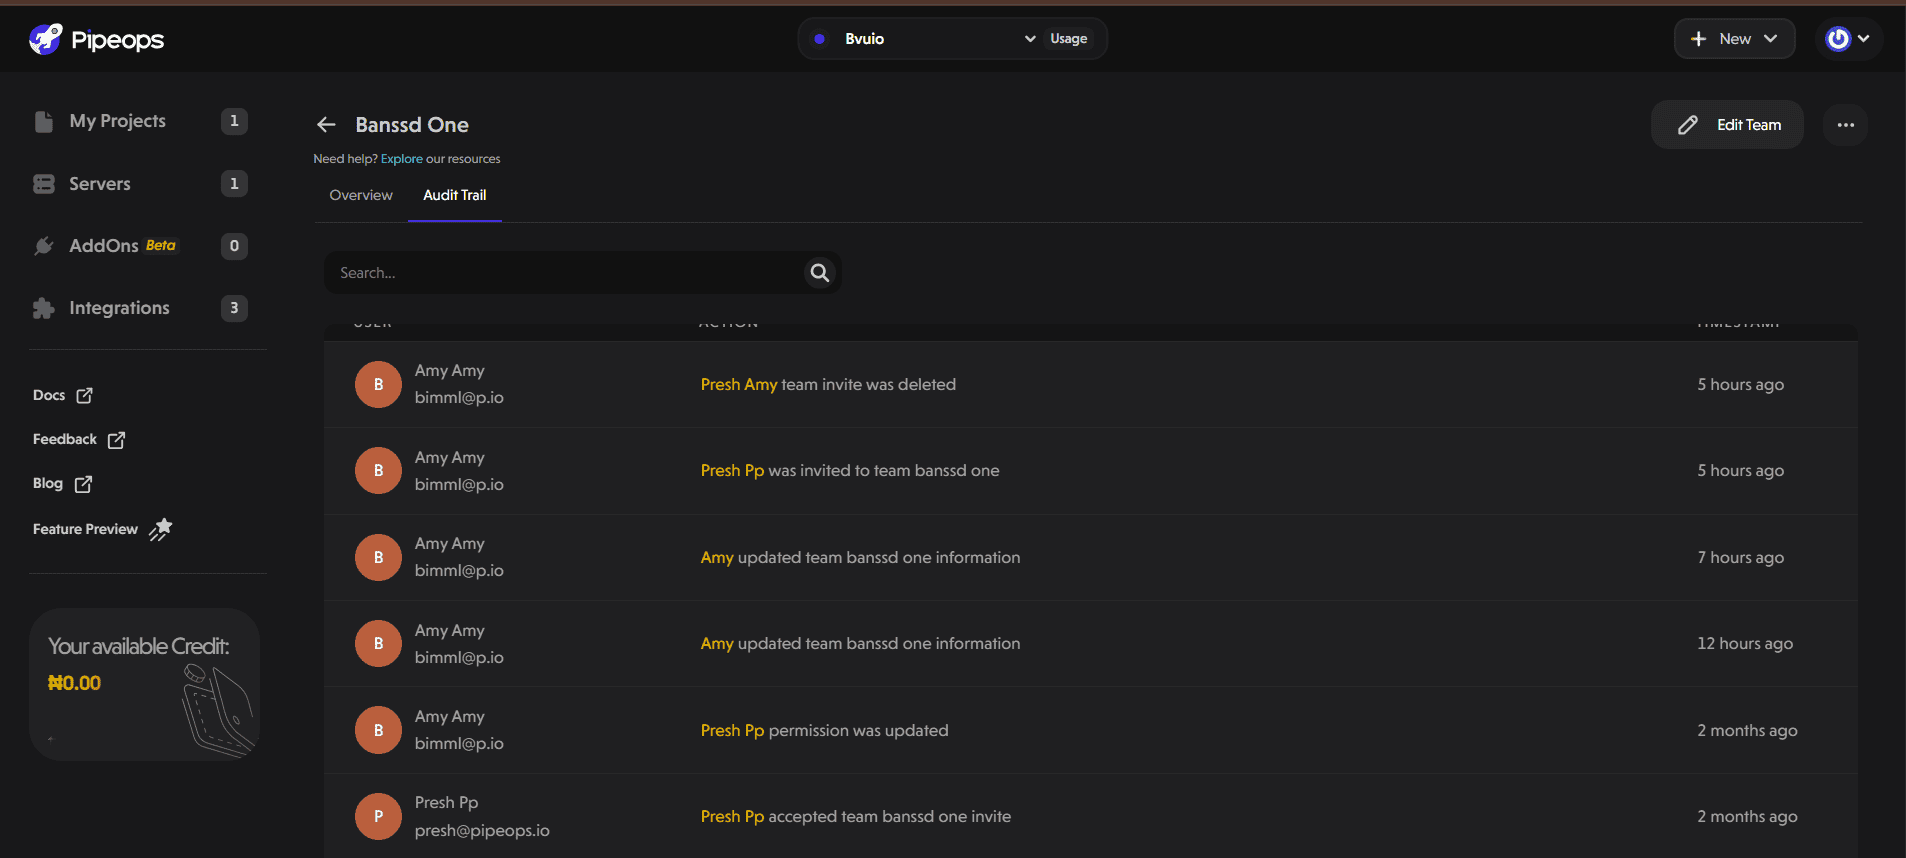
The audit trail displays key details such as:
-
User: The name and email address of the user who performed each action.
-
Action: A description of the event (e.g., permission updates, project creation, member invitations).
-
Timestamp: The exact time when the action was performed.
-
Search Functionality: Use the search bar to find specific actions or filter by keywords.
This feature is essential for tracking changes and monitoring user actions within your team.
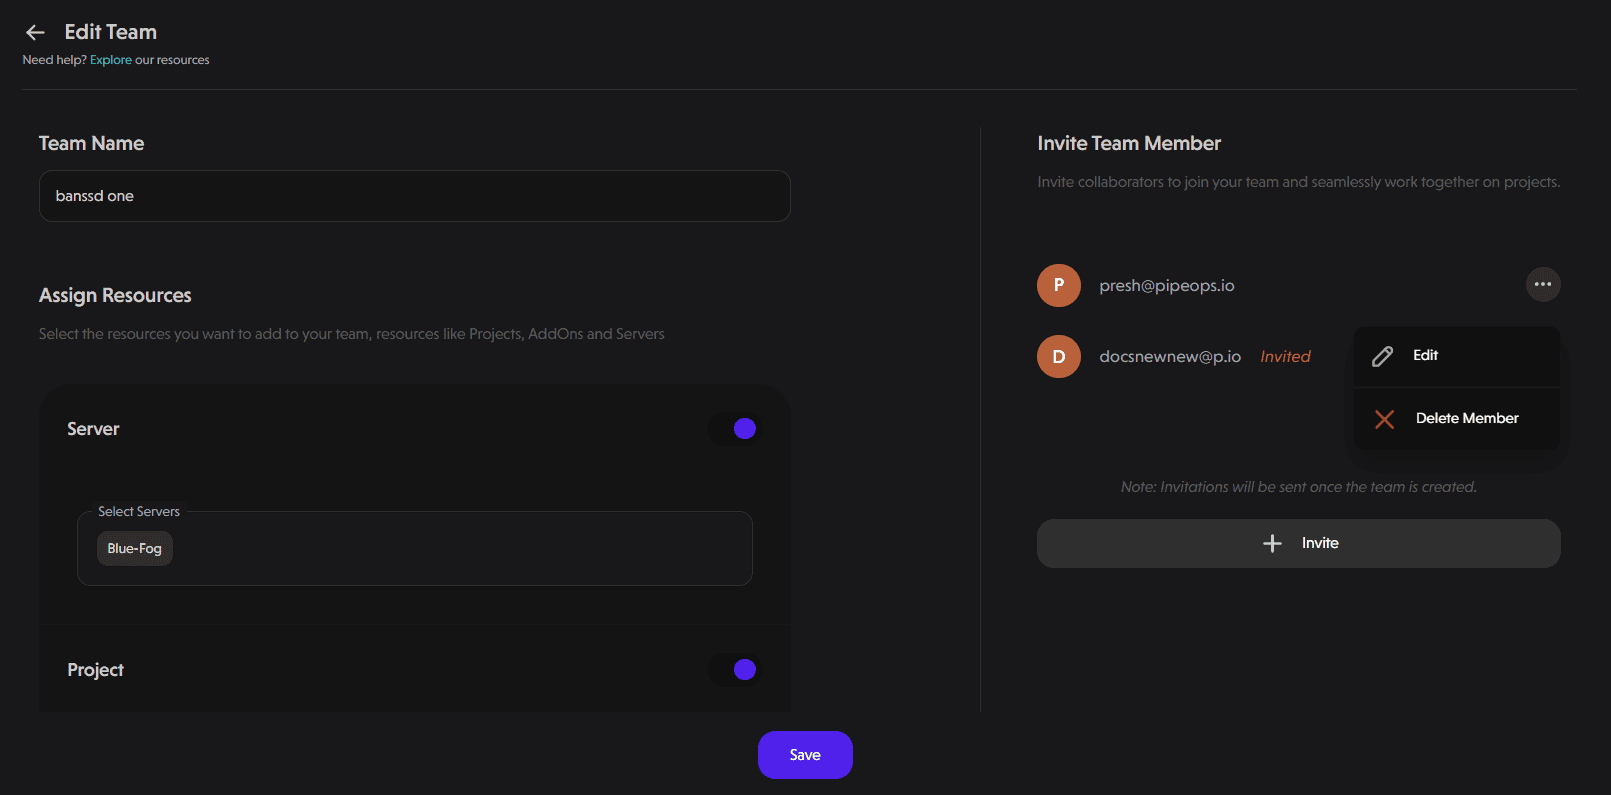
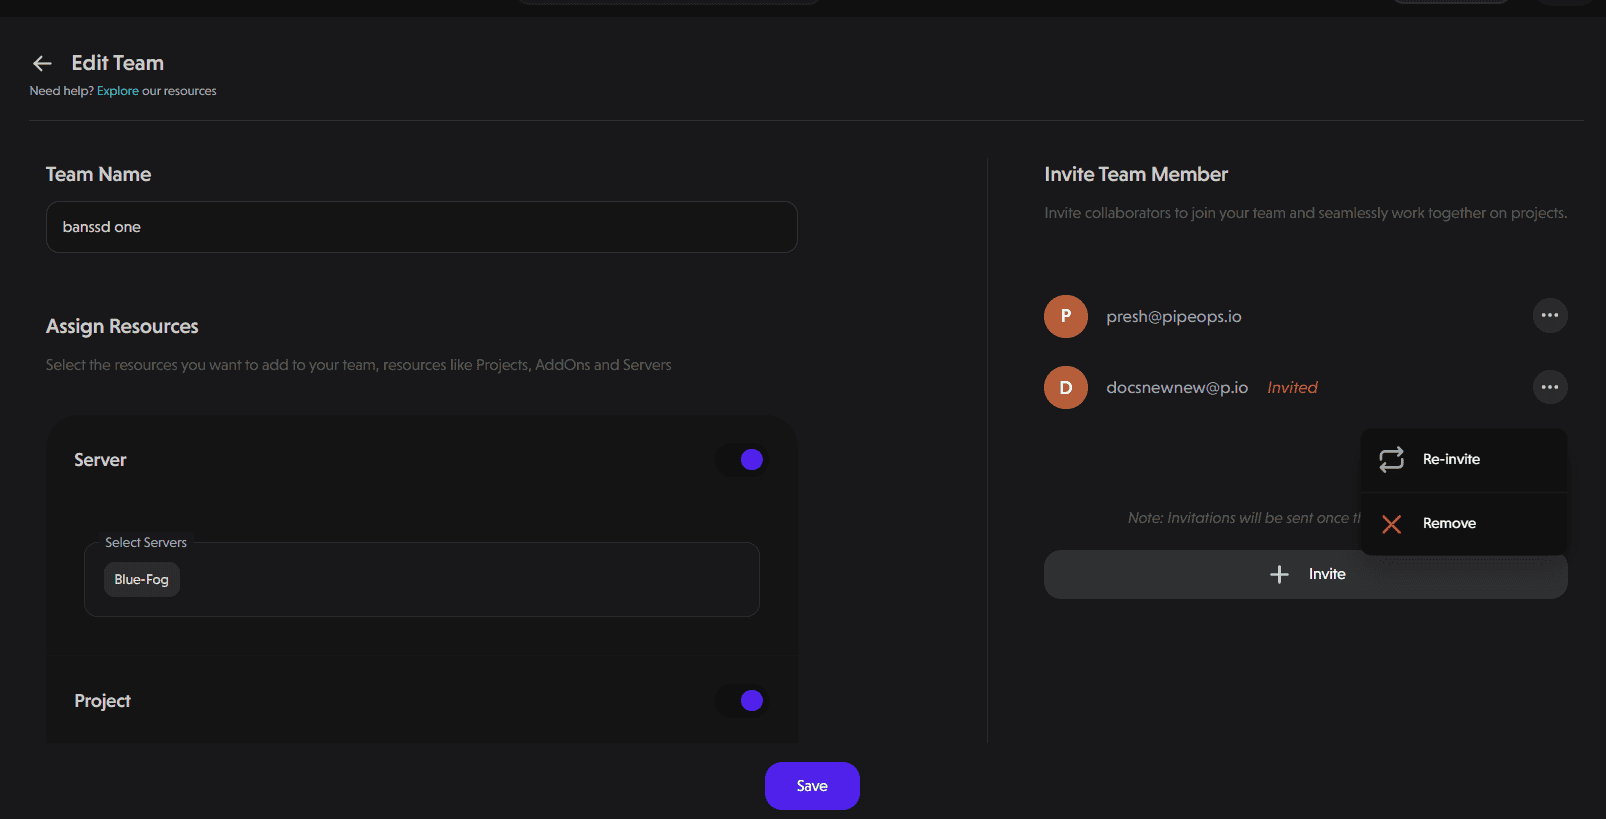
Revoke Invites or Remove Members
Imagine a scenario where you send an invite to the wrong email address or a developer leaves your company, and you need to revoke their access. PipeOps makes it easy to manage membership for each team you create.
Navigate to the team the user belongs to and click the “Edit team” tab at the top right of your dashboard.
This opens a page where you can edit the team details and the list of members, including pending invites. To revoke an invite or delete a member, click the ellipsis close to each email. Doing this opens the option to delete a member or remove the invite.
PipeOps equips you with the proper tools for workspace organization and strategic team setup. You can build teams with appropriate access levels for projects or clients. Regular monitoring through audit trails and access management ensures your collaborative environment remains secure and productive as your workload grows.